
ZeroPortal – Quick Admin Guide
This guide shows, step by step and with screenshots, how to connect the first workstation after installing the server and assign it applications and policies. It follows the exact order setup happens in practice. Background, variations, and operations are covered in the Administration Handbook; the chapter it maps to is named at the end of each section.
The examples use the sample domain uran.local with the portal servers appv03 and
appv04 (port 8080), the package share \\appv01\appvshare$, and the client WS04.
Contents
- Prerequisites
- Group policy for the clients
- Prepare the client
- Install the agent
- App-V packages and connection groups
- Deploy an MSIX package
- Policy set and delivery format
- Store package with dependencies
- Desktop policy
- What comes next
1. Prerequisites
Before you start, you should have:
- An installed, reachable portal (handbook chapters 3 and 4). In the example, a cluster
of
appv03andappv04; a single server works just as well. - A package share with App-V packages and a folder for MSIX packages, readable by the portal servers and by the clients' computer accounts.
- The agent's ADMX template in your domain's central policy store
(
PolicyDefinitions). It is installed with the agent and then sits underC:\Program Files\NickIT\ZeroPortalAgent\admx(handbook chapter 7). - An organizational unit for the clients that are to use ZeroPortal, and an AD
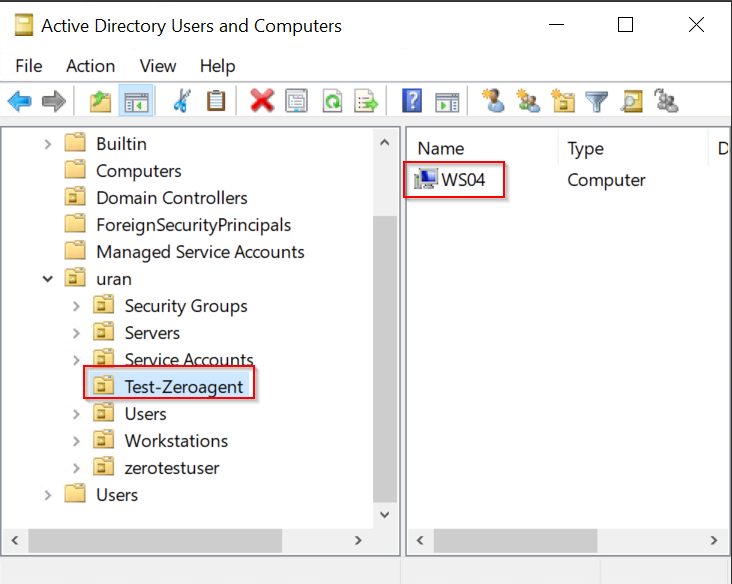
group for the users who receive packages. In the example, the OU
Test-Zeroagentwith the computerWS04, and the groupZeroPortalTest_MSIXUser.
2. Group policy for the clients
Everything the agent needs to know before its first contact with the server comes by group policy: which servers it talks to, and which areas it syncs.
-
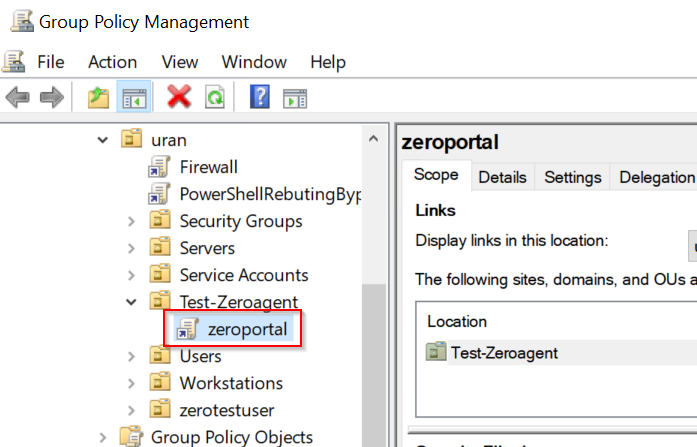
Create a group policy object and link it to the client OU.
-
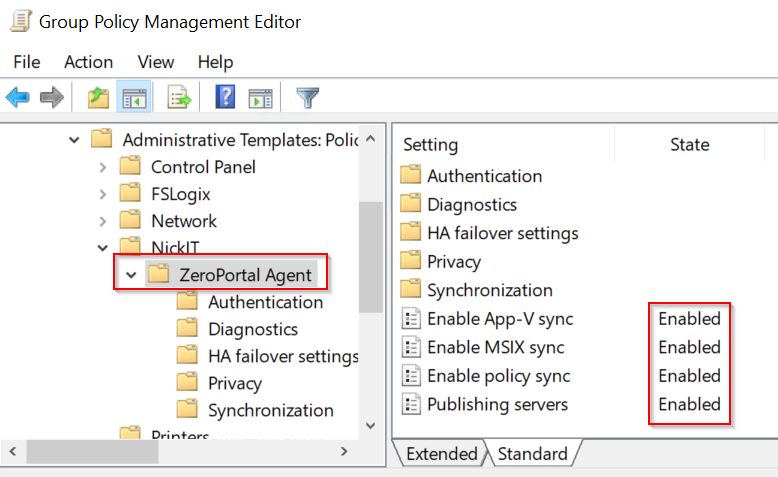
Open Computer Configuration → Administrative Templates → NickIT → ZeroPortal Agent and turn on the four settings Enable App-V sync, Enable MSIX sync, Enable policy sync, and Publishing servers. After installation, all three sync areas are off; without these settings, the agent does nothing.
-
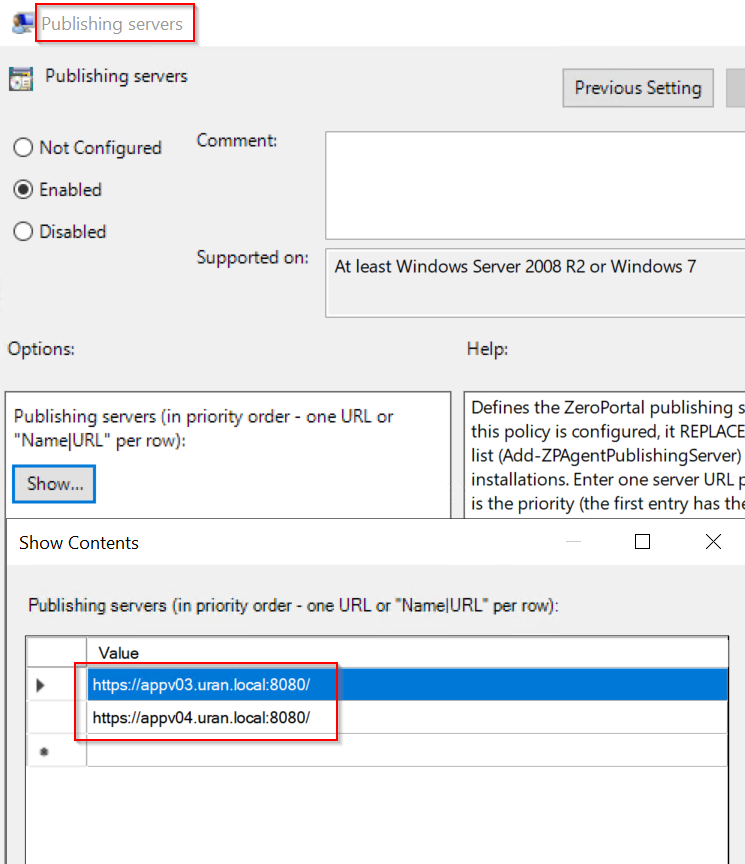
Under Publishing servers, enter the portal servers, one URL per line and in priority order. The agent uses the first reachable server and switches to the next one automatically on failure (handbook chapter 11).
The policy applies at the client's next group policy run, or right away with
gpupdate /force. Further template settings (failover, timing, diagnostics) are
described in handbook chapter 7.
3. Prepare the client
The client needs three things before the agent can be installed.
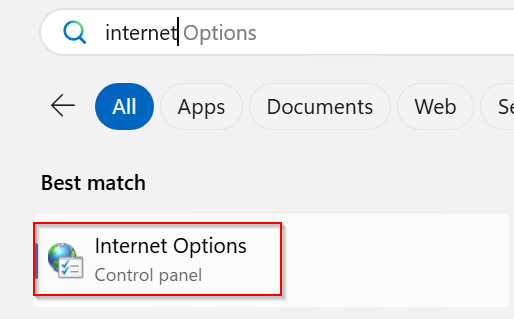
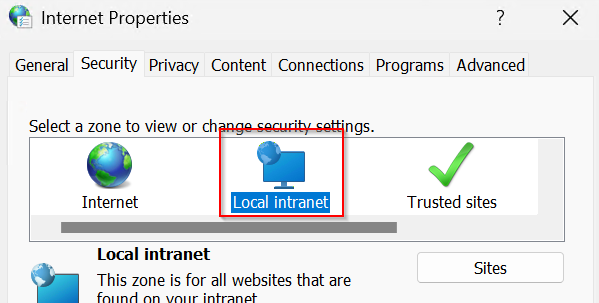
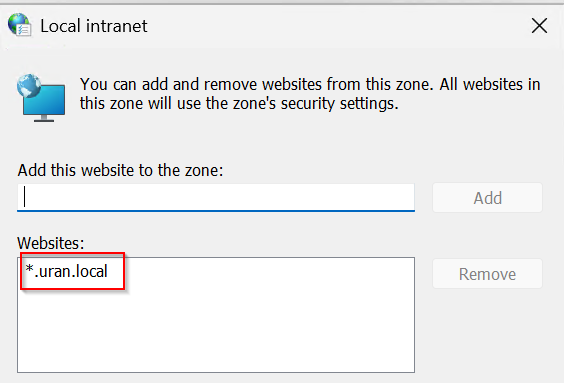
Intranet zone. For the browser and the agent to sign in to the portal via Kerberos without a login window, the portal's domain must be in the Local Intranet zone. In the example this is done by hand through Internet Options; in production, roll out the zone mapping by group policy (handbook chapter 3, SSO section).
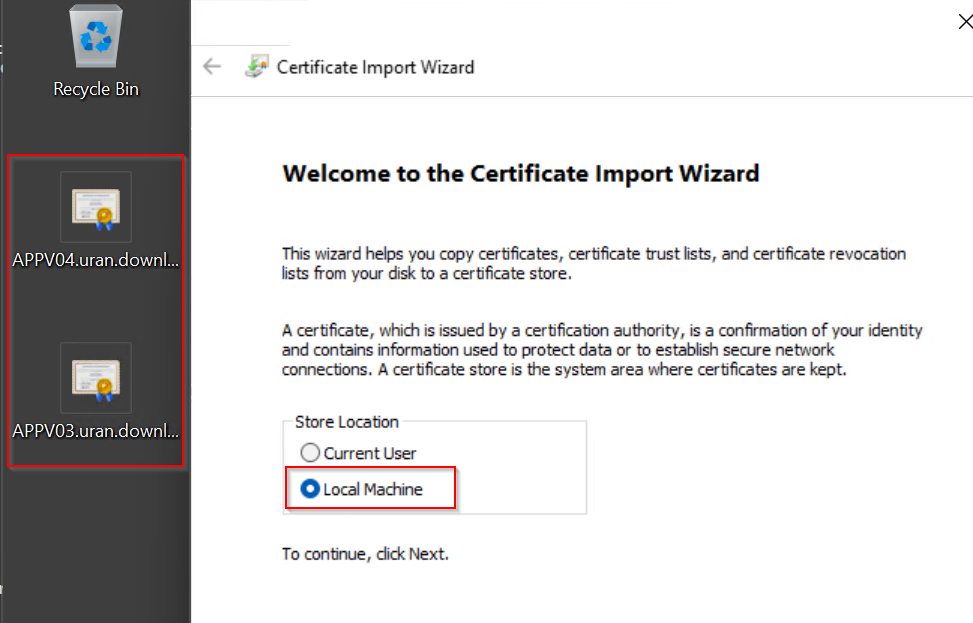
Server certificate. The client must trust the portal servers' certificate. With a certificate from your company's CA, it already does. In a test setup with self-signed certificates, import the server certificates into the local computer's Trusted Root Certification Authorities store, because the agent service runs as System.
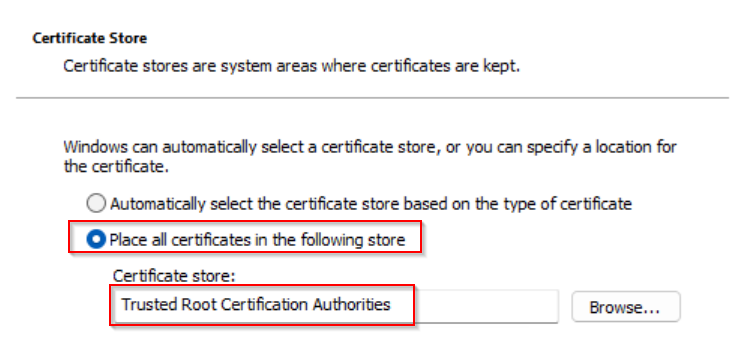
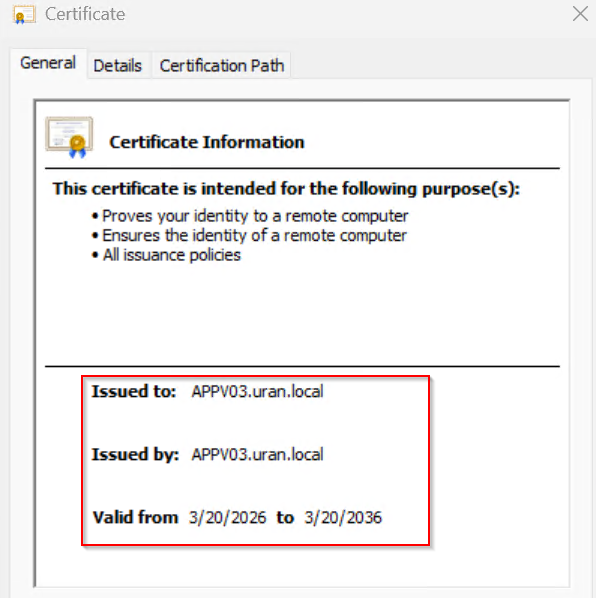
App-V client. On Windows 10 and 11 Enterprise, the App-V client is part of the system and is switched on once in an administrative PowerShell session, then restart:
Enable-Appv
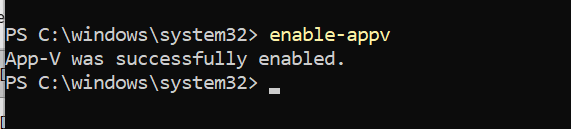
For MSIX-only clients, skip this step.
No ZeroPortal agent? Then the portal takes the place of the App-V publishing server, and you point the Microsoft client at it yourself: publishing
https://<portal>:<port>/AppVPublishing, reportinghttps://<portal>:<port>/AppVReportReceiver, by group policy under System → App-V or withAdd-AppvPublishingServer. The handbook describes both paths, along with a recommendation on the shared content store, in the chapter Distributing App-V packages. This guide takes the other path: the agent.
4. Install the agent
-
In the browser, open the portal's download centre (
https://<server>:8080/Downloads) and download the ZeroPortal Client Agent. The portal always offers the version matching the server.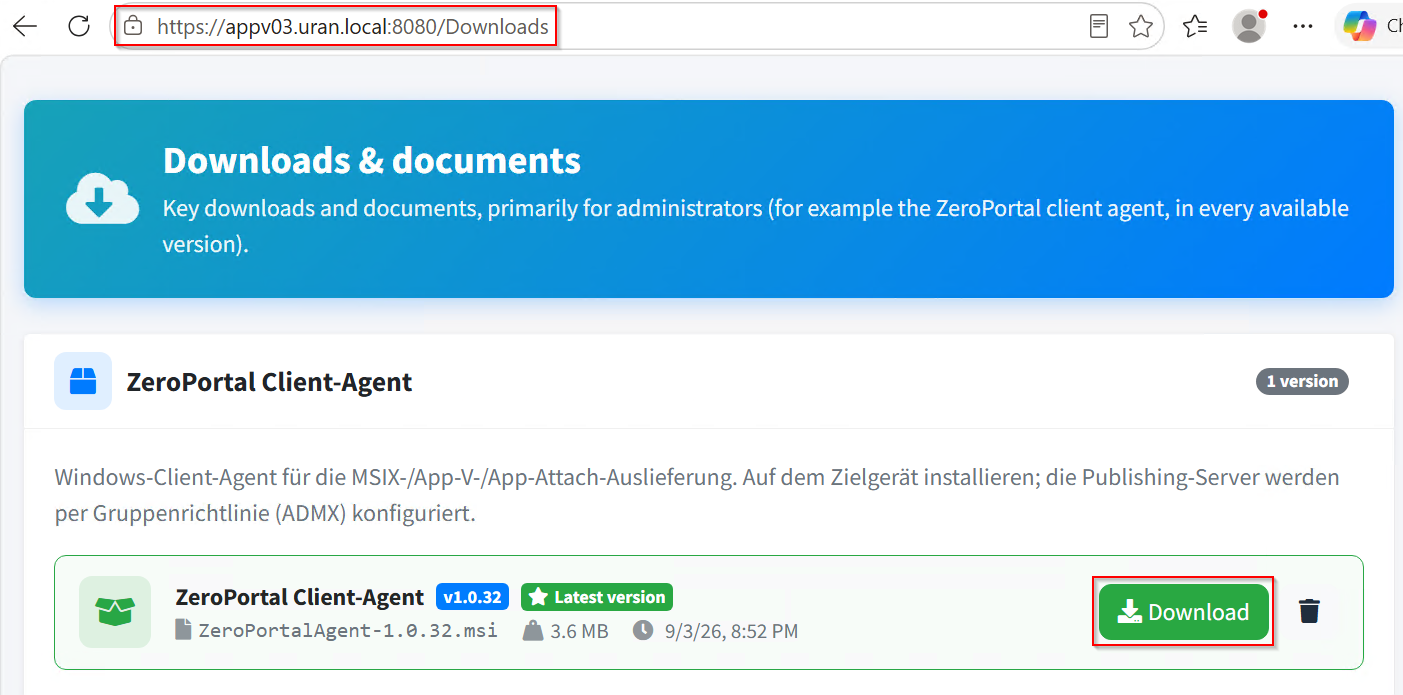
-
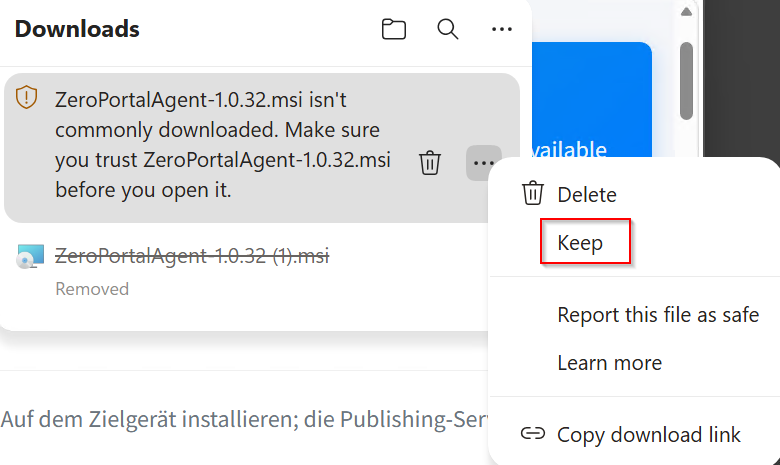
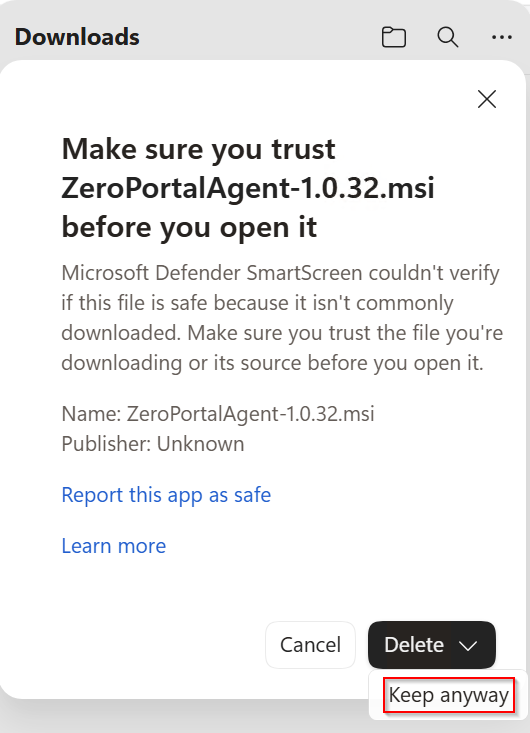
Edge and SmartScreen warn about a rarely-downloaded file. Choose Keep and Keep anyway; the file comes from your own portal, SmartScreen just doesn't know it yet.
-
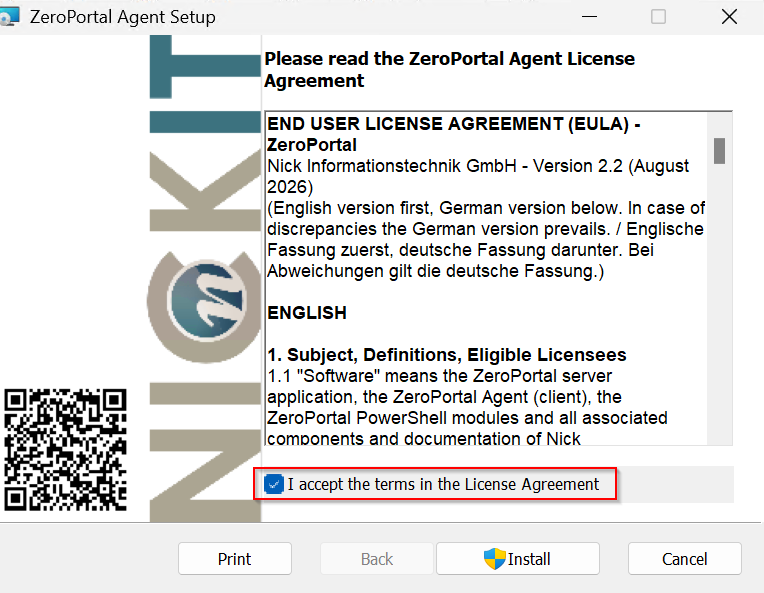
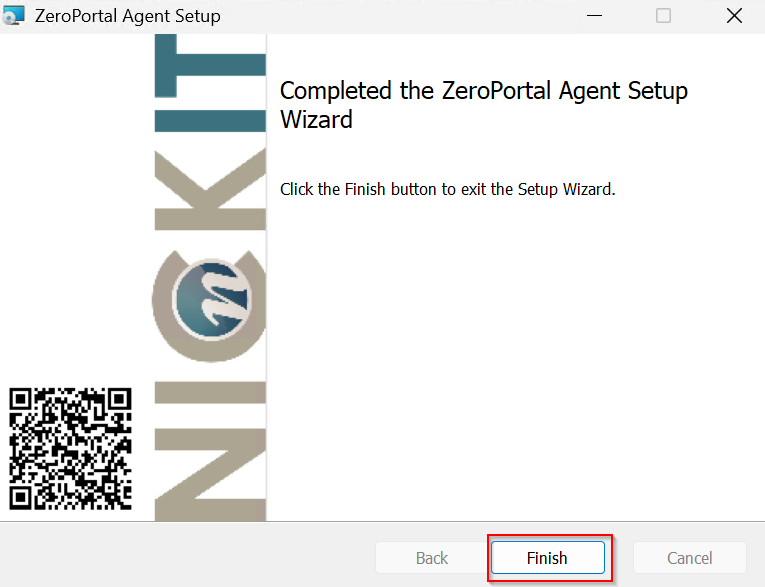
Run the MSI from the downloads folder, accept the licence agreement, and finish the wizard. The service starts right away; no restart is needed. For mass rollout, the MSI works unchanged with your software deployment tool or a group policy (handbook chapter 7).
-
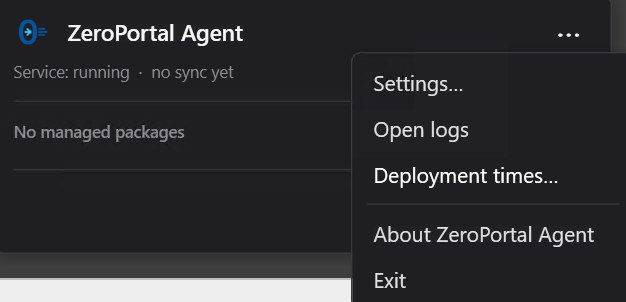
The agent's icon appears in the tray. The menu behind the three dots offers settings, the log folder, and deployment times. Service: running · no sync yet is the expected state right after installation.
-
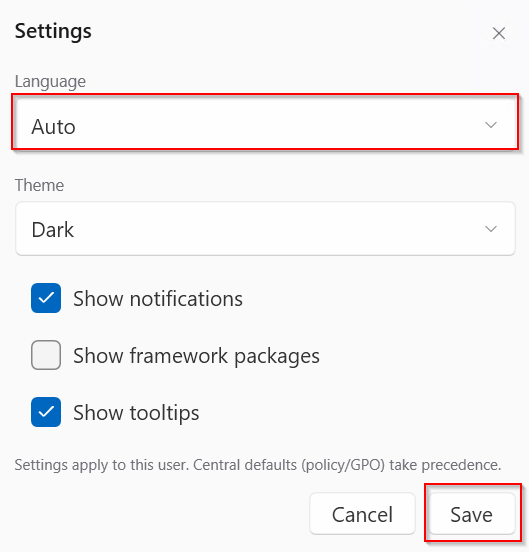
Under Settings, each user picks their own language, theme, and notifications. Central settings from a policy or group policy take precedence.
5. App-V packages and connection groups
App-V packages are assigned to an AD group in the portal and published; the agent fetches them at the next sync. Details on import and entitlements: handbook chapter 8.
-
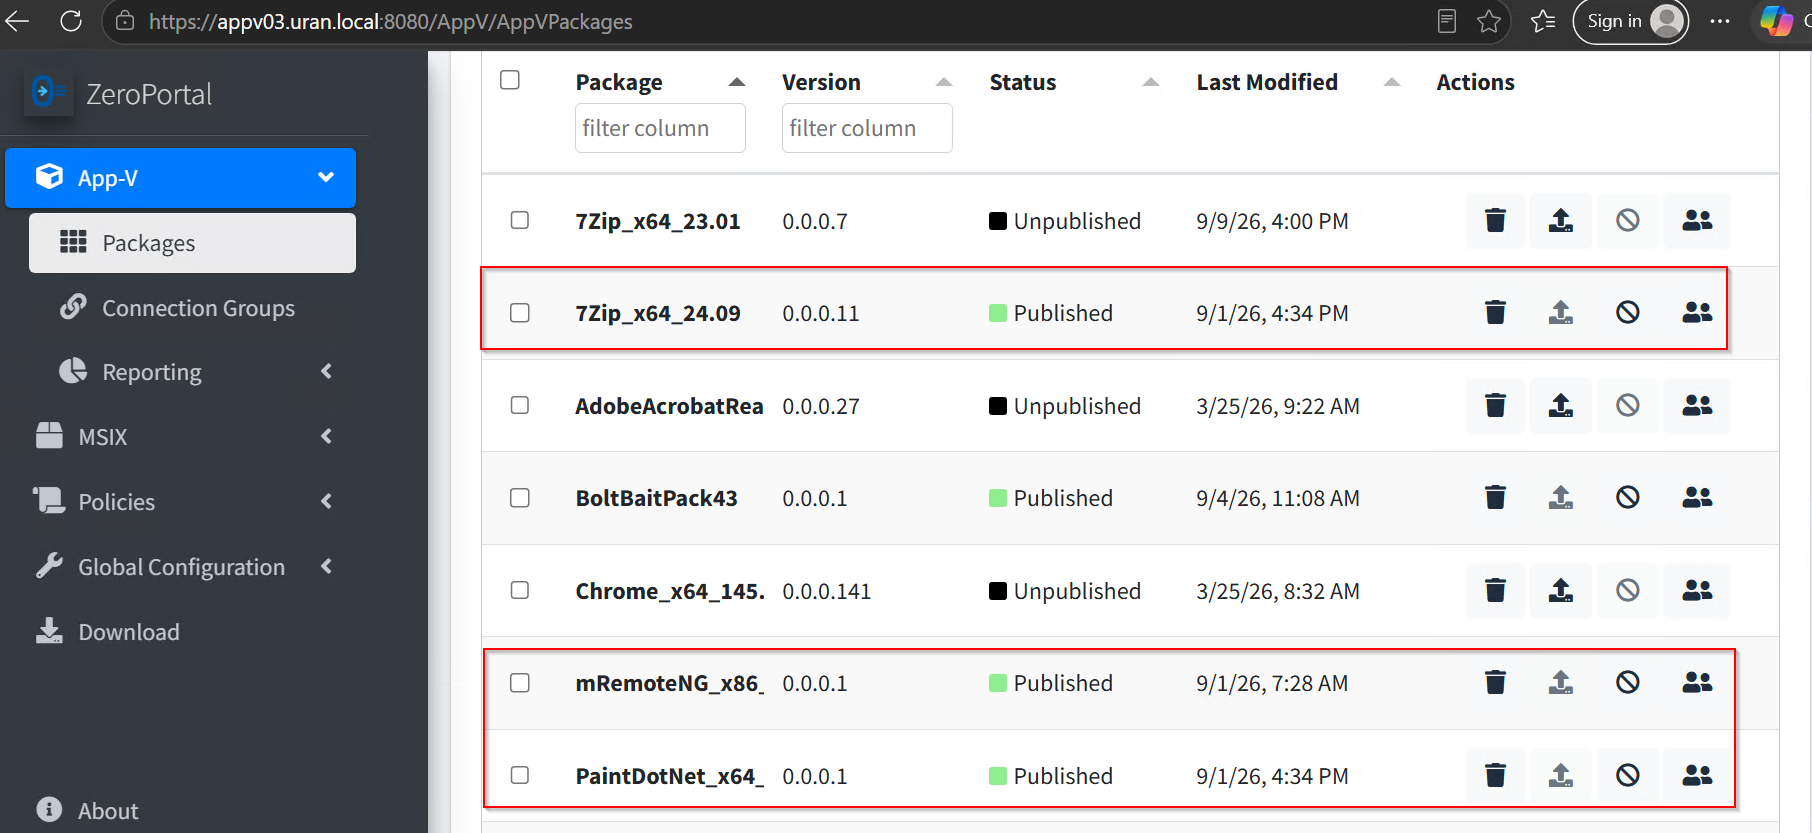
Under App-V → Packages, three packages are published in the example: 7-Zip, mRemoteNG, and Paint.NET. Assignment to the user group happens on the package page, under Access.
-
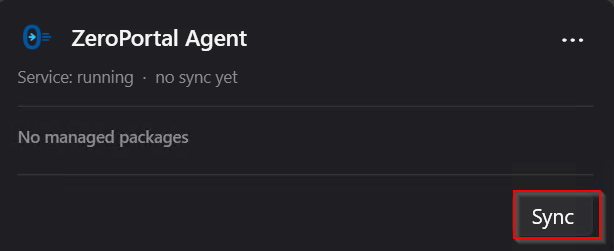
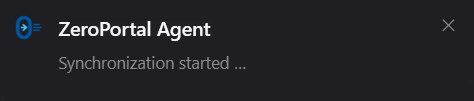
On the client, a click on Sync in the tray window is enough; otherwise the agent waits for its next scheduled sync or the next sign-in.
-
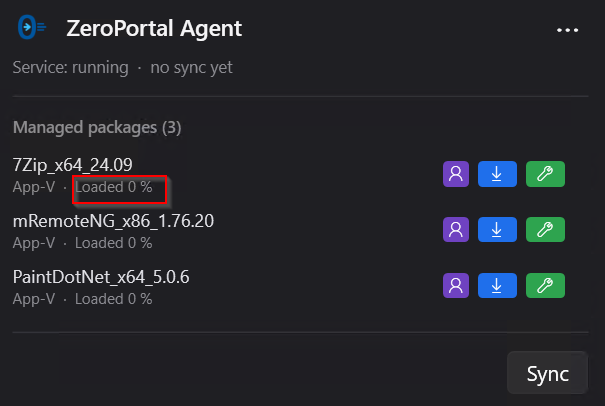
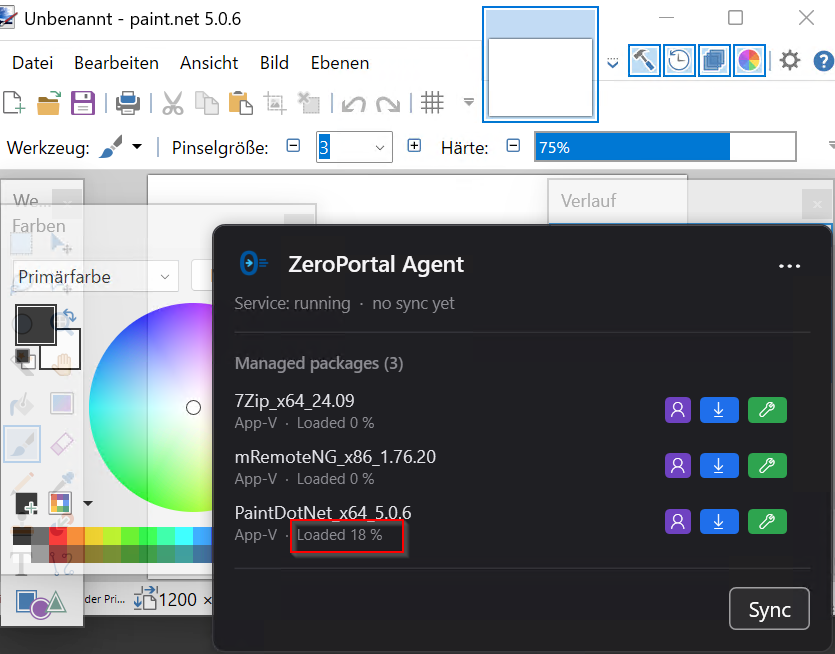
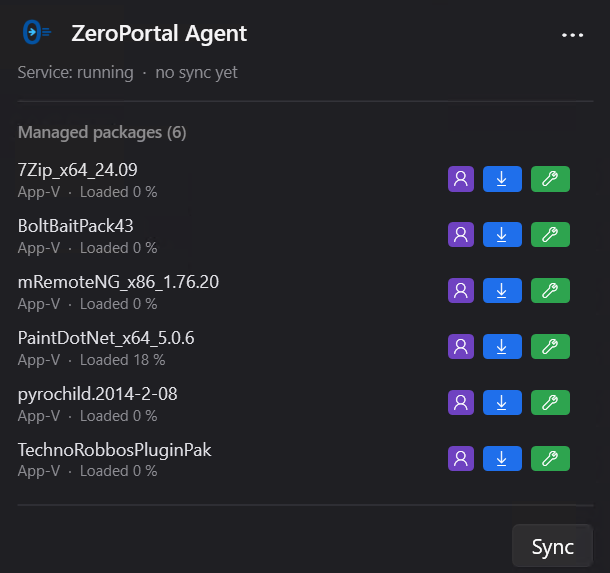
The packages appear as Managed packages with Loaded 0 %: they are registered, and their content streams in on first launch. The value rises as soon as an application is running.
-
The App-V client itself can confirm this on the client:
powershell
Get-AppvClientPackage *Paint*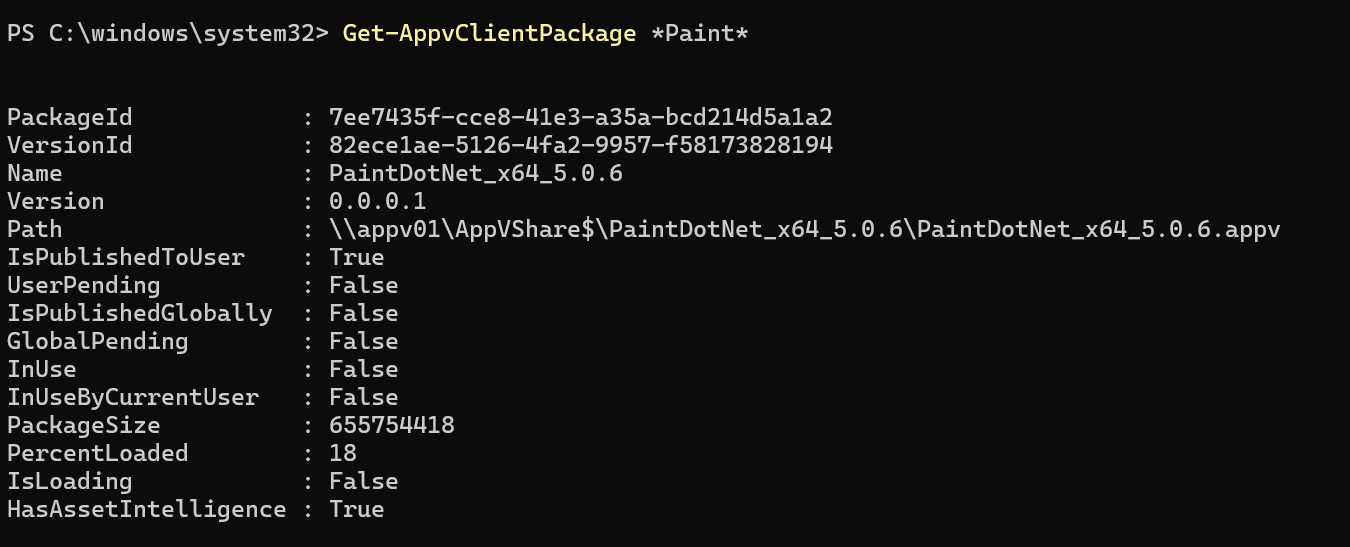
Connection groups run several packages in a shared environment, for example an application with its plugins. Under App-V → Connection Groups, create the group, pick the packages and the entitled AD group, and publish it.
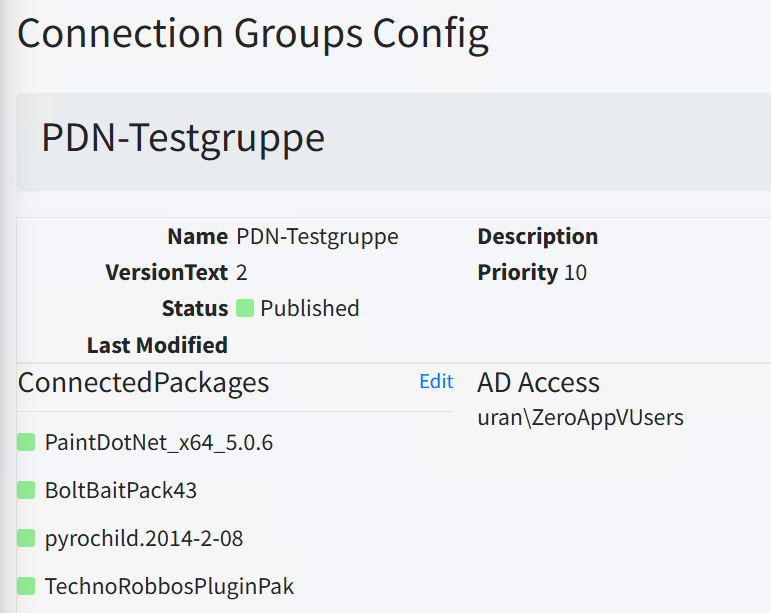

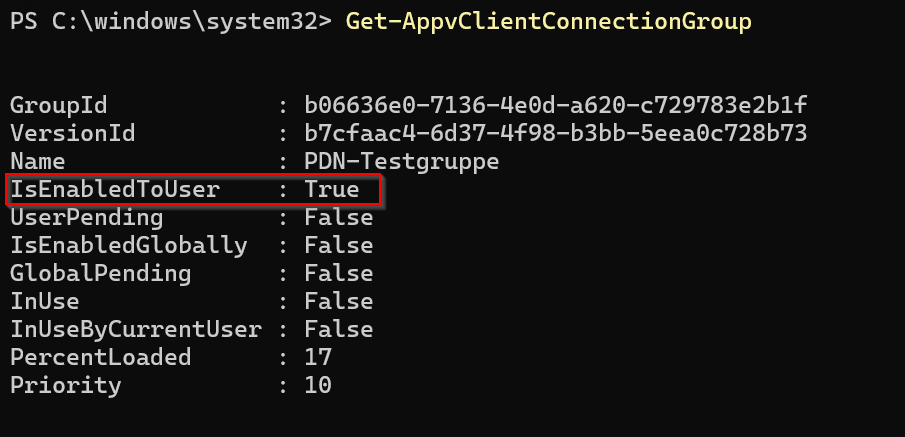
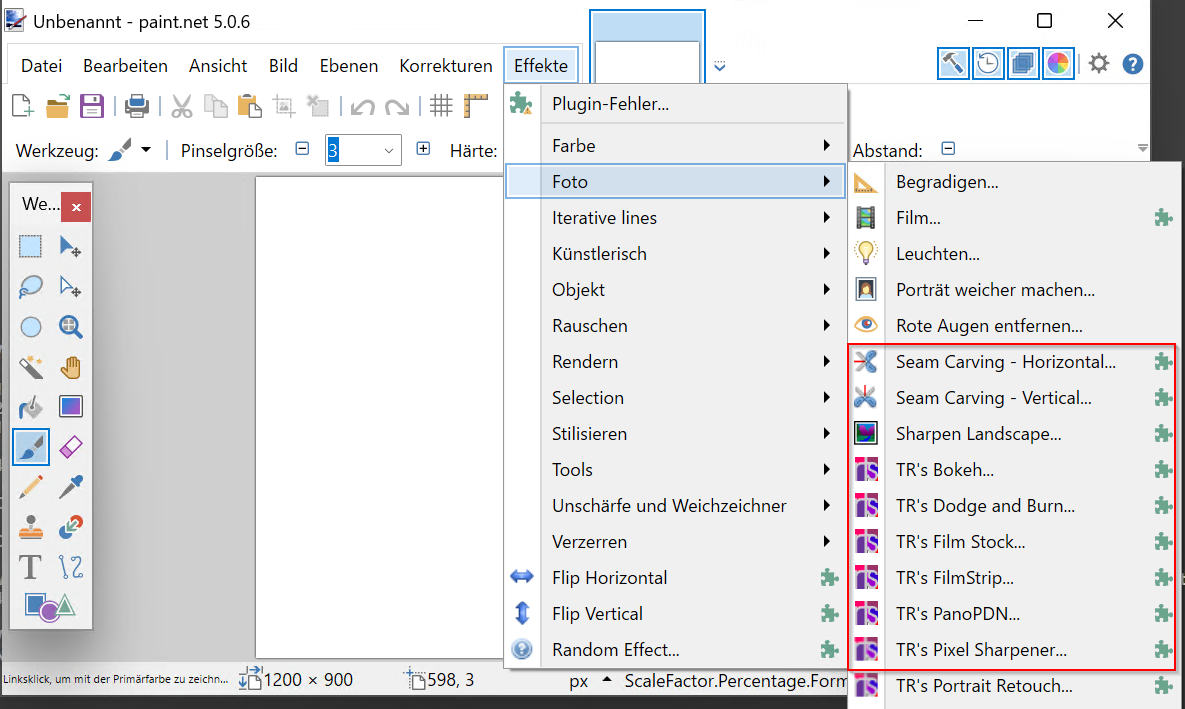
After the next sync, every member of the group appears in the tray window, the connection group is active for the user, and the plugins show up in Paint.NET.
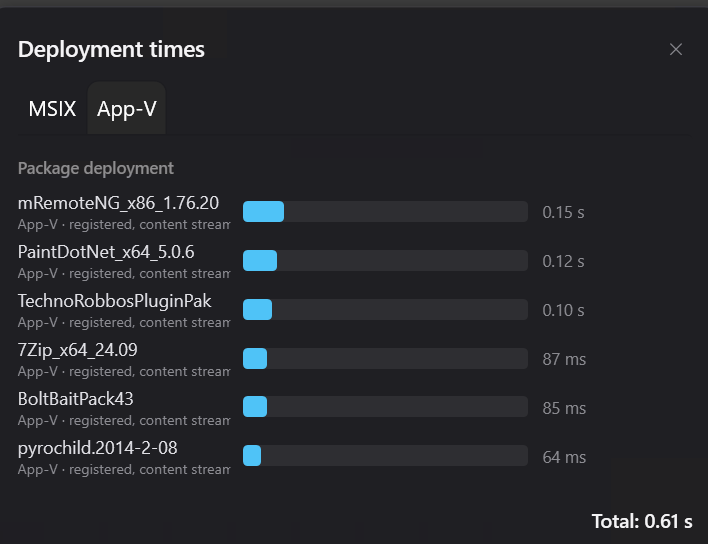
Deployment times in the tray menu shows how long each step took.
6. Deploy an MSIX package
Using Firefox ESR as the example: get the package, put it on the share, import it, entitle it, publish it. Background on signatures, formats, and downgrades: handbook chapter 9.
-
Get the package. Many vendors ship MSIX packages through winget. Downloading without installing puts the file in a folder of your choice:
powershell
winget download --id Mozilla.Firefox.ESR.MSIX -d C:\temp\Store-Pakete\firefox\
-
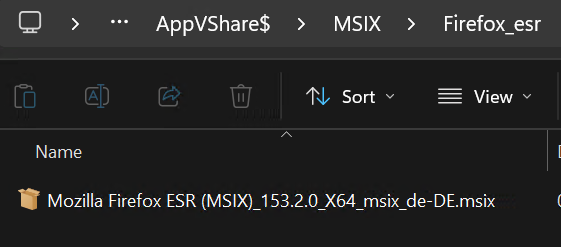
Copy to the share. A subfolder per application inside the MSIX folder on the share keeps the repository tidy.
-
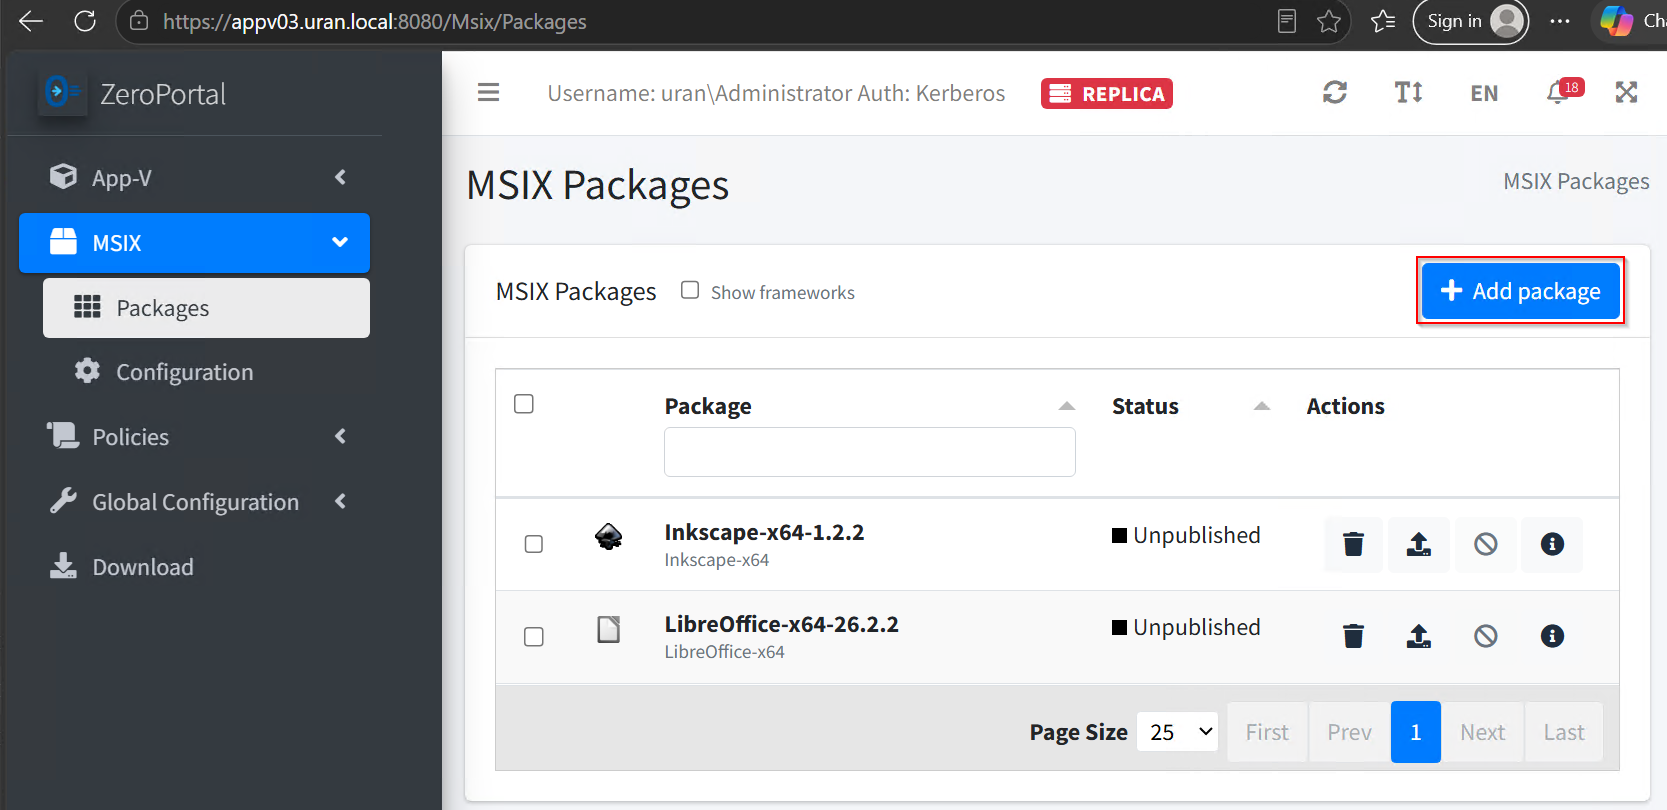
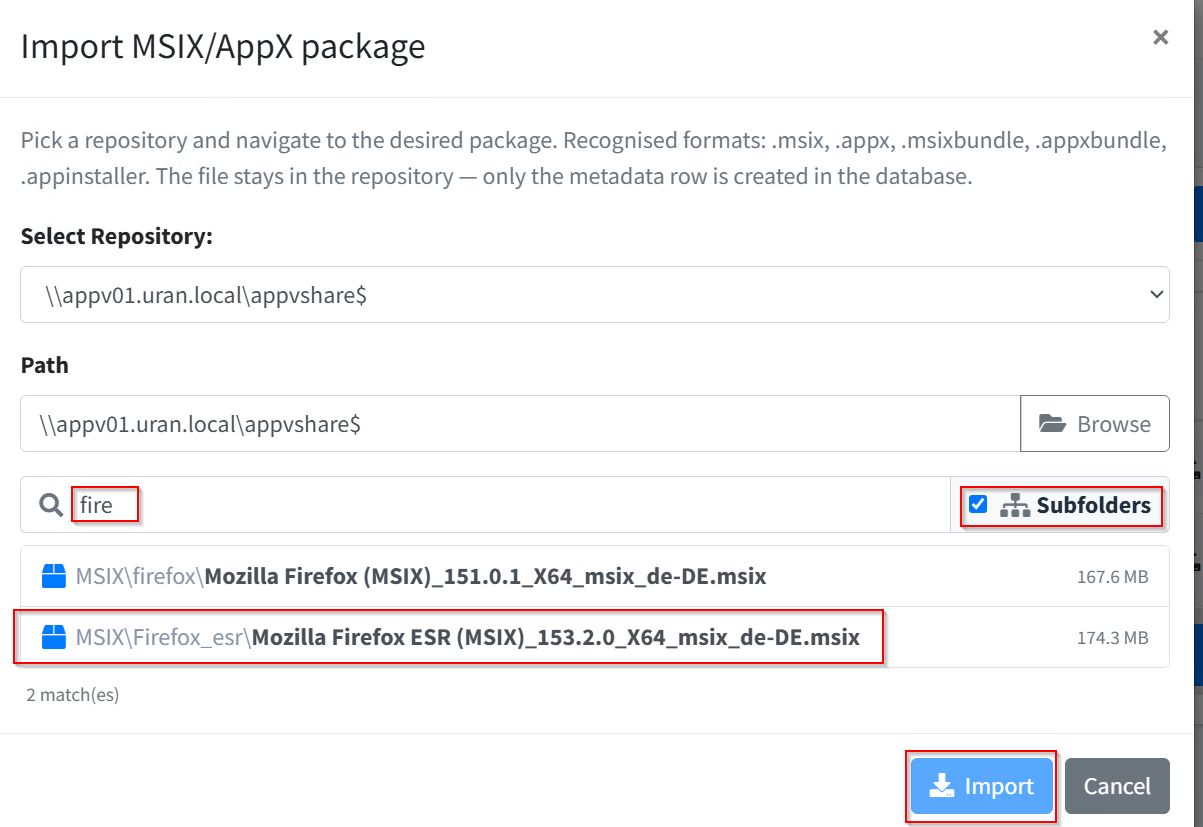
Import. Under MSIX → Packages, click Add package, pick the repository, search for the package with Subfolders on, and choose Import. The file stays on the share; the portal only creates the catalogue entry.

-
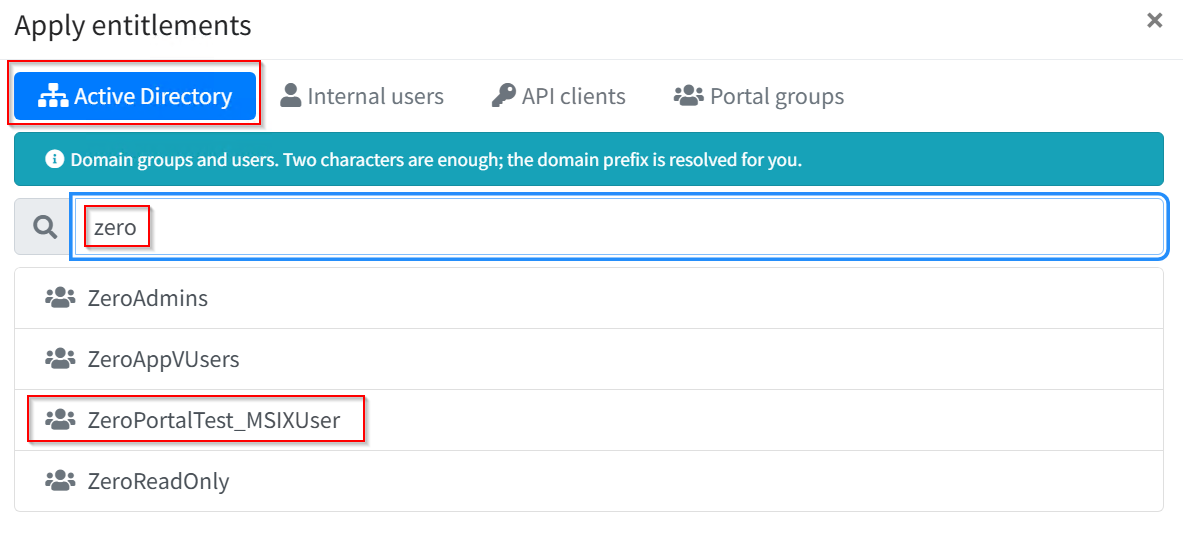
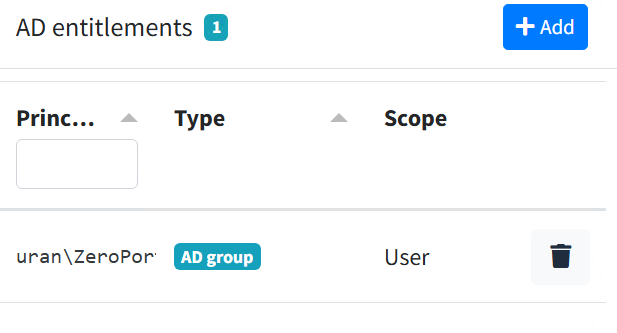
Entitle it. On the package page under AD entitlements, use Add to search for the users' AD group and apply it. Two characters are enough to search. Besides AD groups, MSIX also accepts portal groups, internal users, and API clients.
-
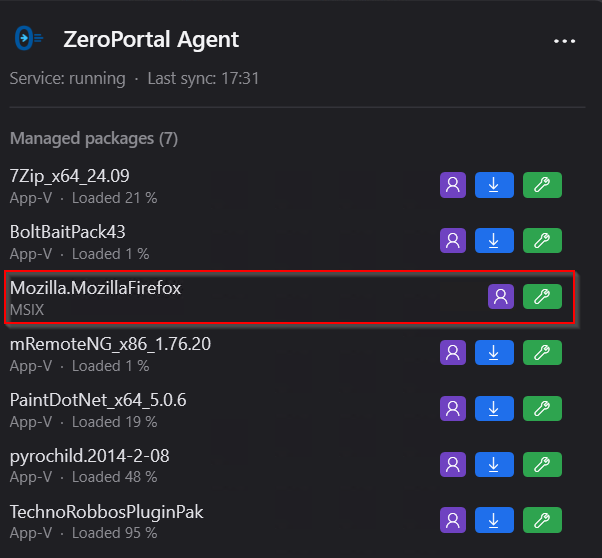
Publish. Choose Publish at the top of the package page. After the next sync, the package shows up in the tray window as an MSIX.

-
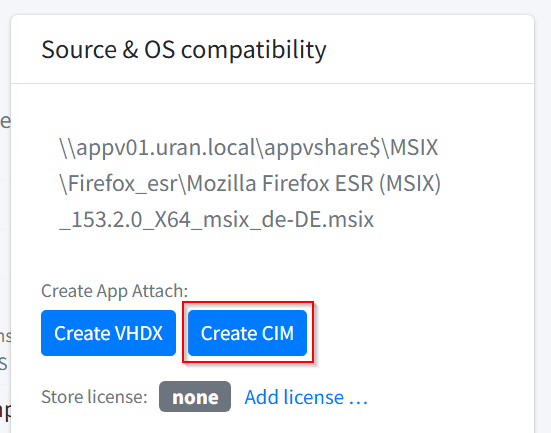
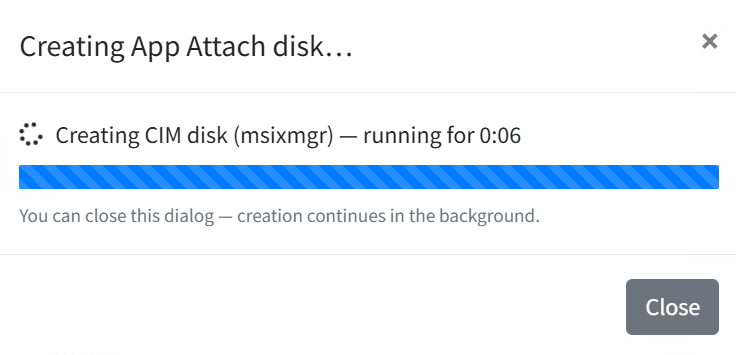
Prepare App Attach (optional, for terminal servers and VDI). On the Source & OS compatibility card, Create CIM or Create VHDX builds the image next to the package on the share. Creation carries on in the background even if you close the dialog. Whether a client gets the image or the classic package is decided by the policy in the next section.
7. Policy set and delivery format
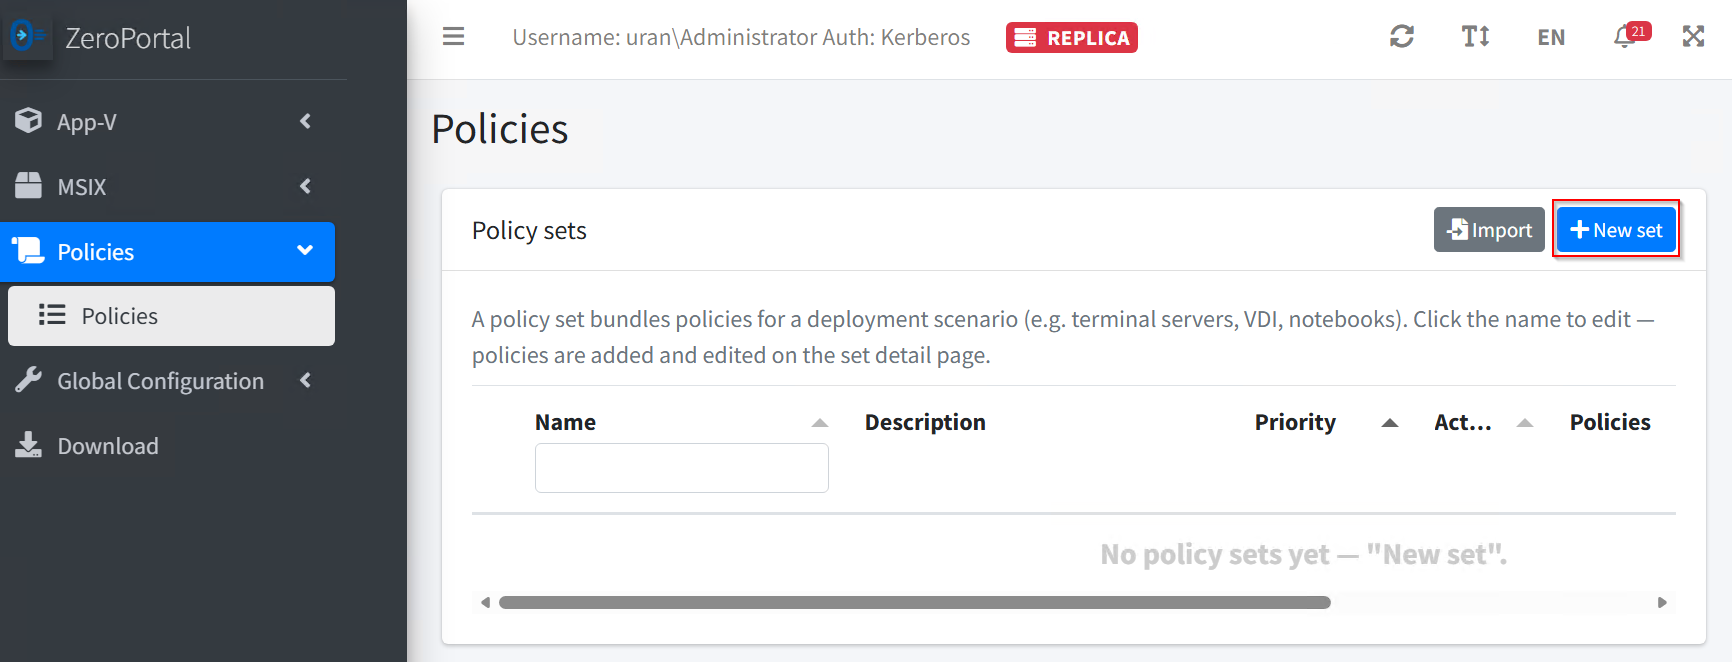
Policies are bundled into policy sets. A set has a scope (which computers or users it applies to) and can hold any number of policies. For a VDI or terminal-server set, the first policy is the delivery format. Basics and filters: handbook chapter 10.
-
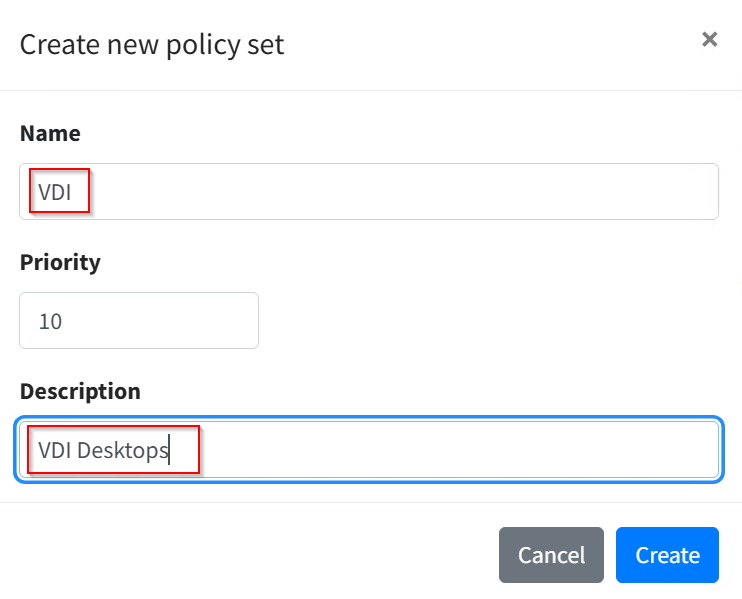
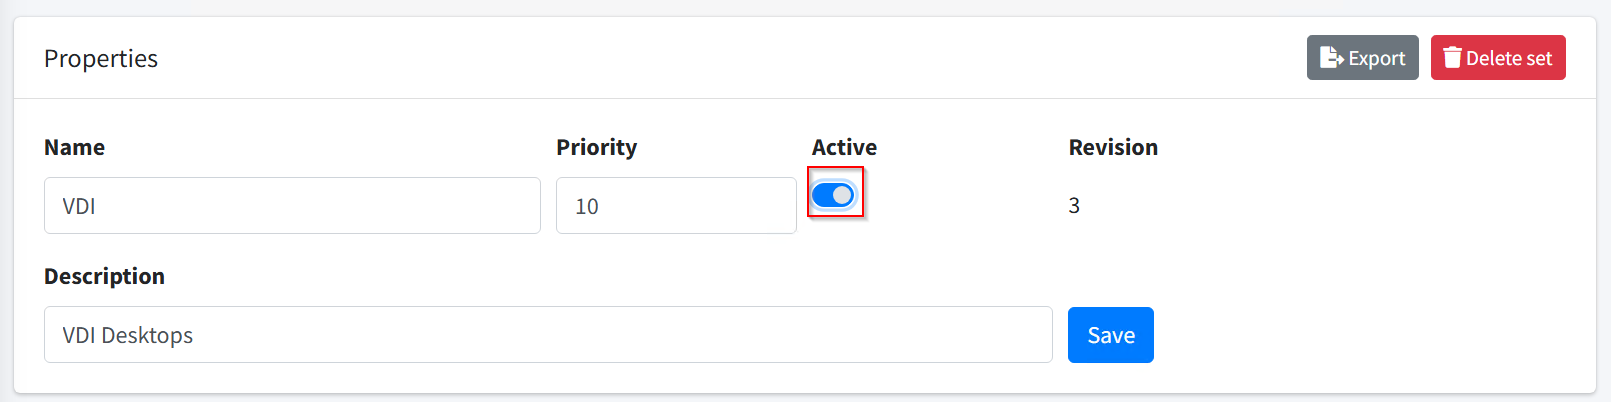
Under Policies, use New set to create a set, in the example VDI with priority 10.
-
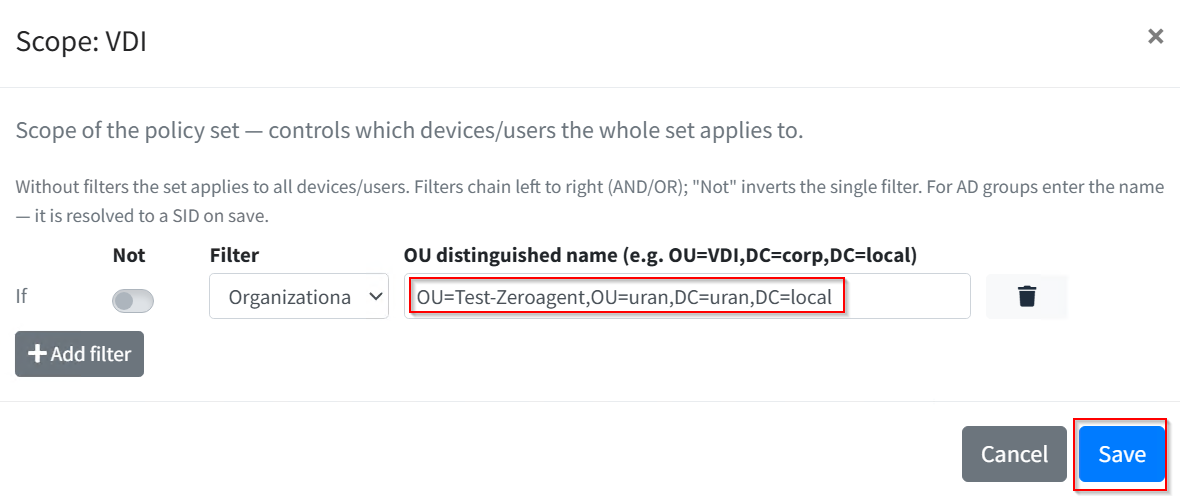
Use Edit scope to set the scope. In the example, the clients' OU; a computer name with wildcards, an IP range, or an AD group also work. A set targeting computers also brings the user parts to whoever is signed in on them.

-
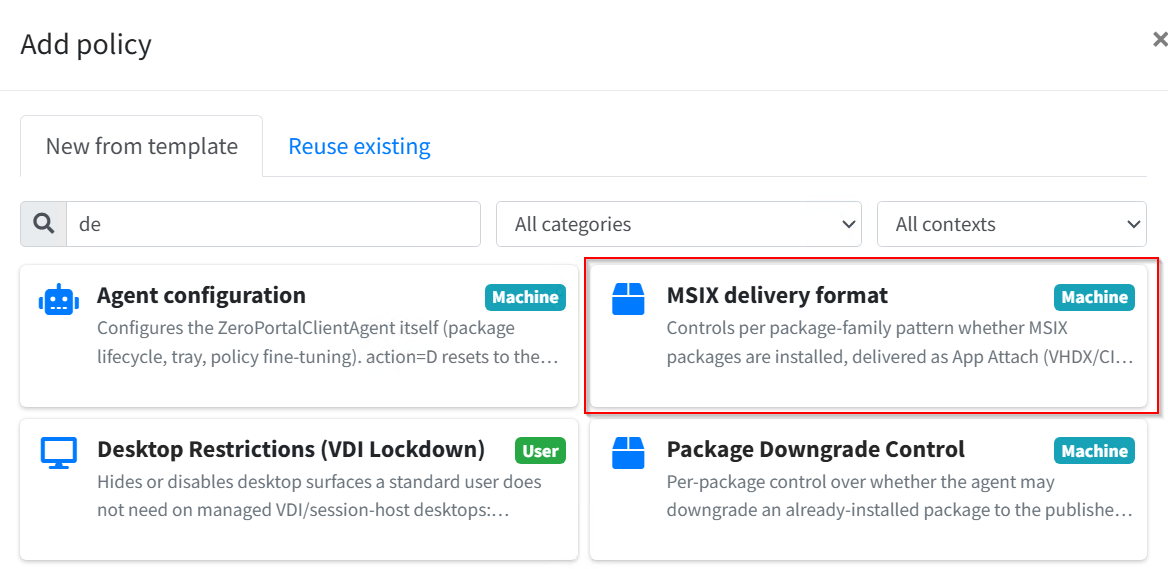
Use Add policy to pick the MSIX delivery format template. Search filters the templates; the Machine or User tag shows which sync the policy applies in.

-
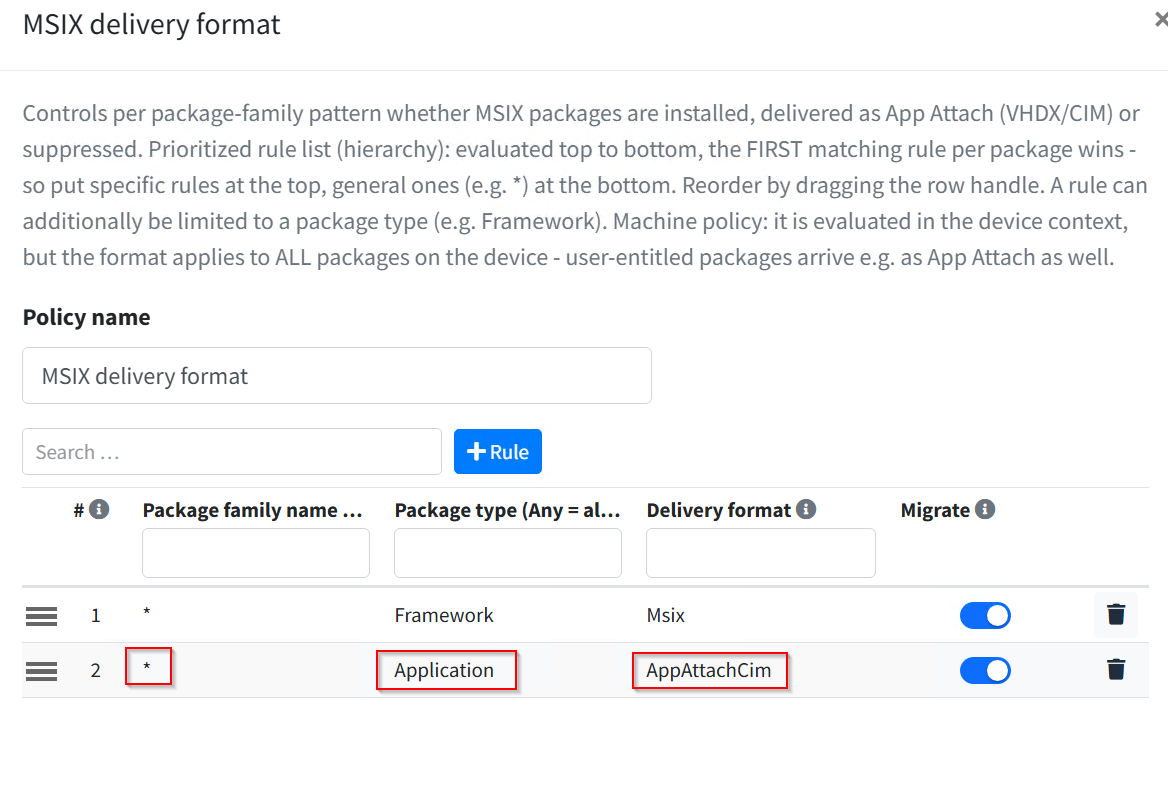
Rules are evaluated top to bottom, the first match wins. The rule * / Framework / Msix is preset, because frameworks always install the classic way. Below it, the rule * / Application / AppAttachCim covers every application.
-
Arm the set with the Active switch; a new set starts out inactive.
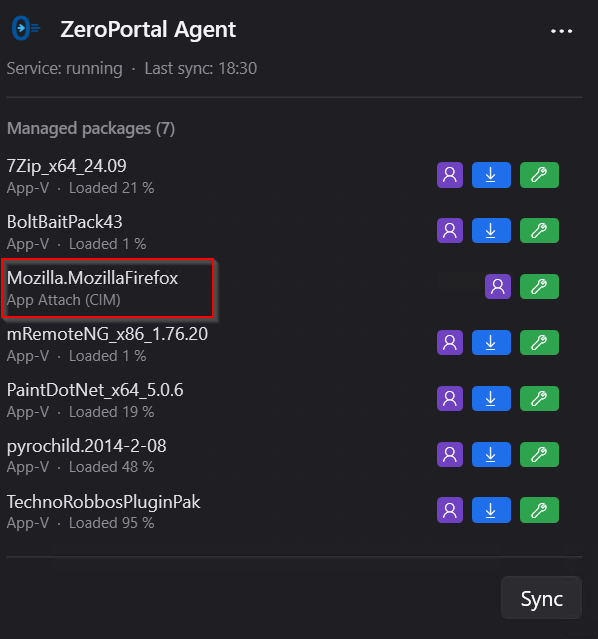
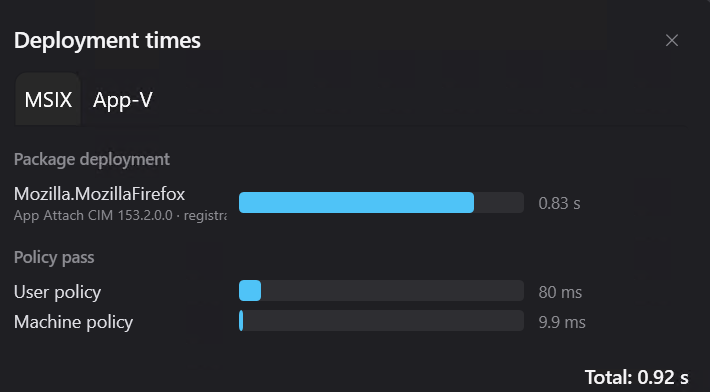
At the next sync, the agent fetches the rules and delivers Firefox as App Attach (CIM); a package that was already installed the classic way gets switched over. Deployment times show how long the package and the policy run took.
The Agent configuration template joins a set the same way. It sets agent switches centrally, without group policy — for example clearing Kerberos tickets before every user sync, so new group memberships apply without signing in again.


For a single device or a test, the same switch also works locally, in an administrative PowerShell session on the client:
Set-ZPAgentConfiguration -PurgeUserTicketsBeforeSync $true
Every switch in the template is a parameter like this; Get-ZPAgentConfiguration shows
all of them with value and source. Values from a policy or group policy win over local
ones.
8. Store package with dependencies
Packages from the Microsoft Store bring a licence file and dependencies on frameworks. The portal recognises both and walks you through what's missing. Using Microsoft To Do as the example:
Store apps without the Store. winget can also download packages from the Microsoft Store, including the licence file Windows needs for installation. This is how you deploy Store apps to devices that have no access to the Store, or where it is blocked. The Store ID is in the product page's URL (
apps.microsoft.com/detail/9NBLGGH5R558), or comes fromwinget search "To Do" --source msstore.
-
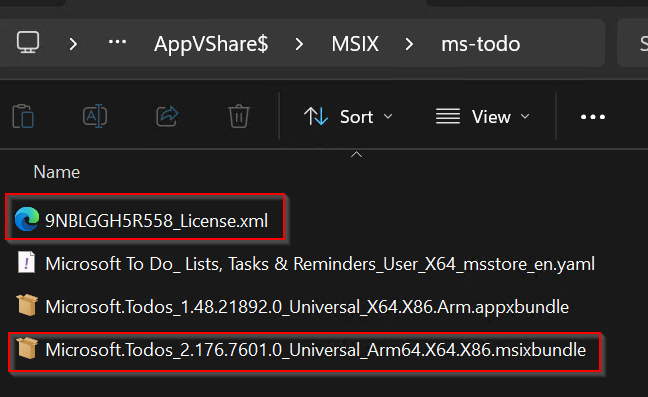
Get it. winget downloads the package by Store ID; next to the bundle you'll then find the licence file
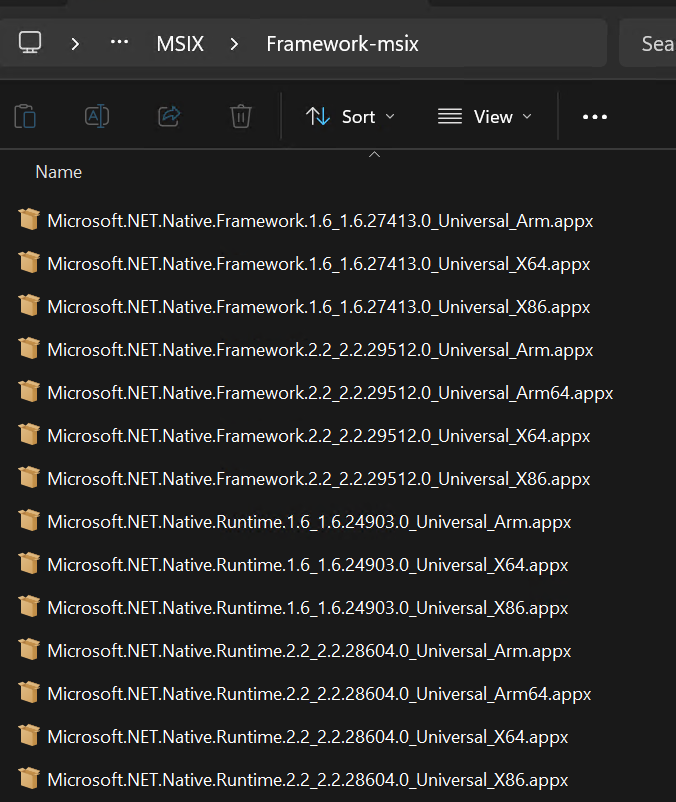
<ID>_License.xml. Copy both files to the share together; the portal recognises the licence file on import and shows it on the package page under Store license. Put the frameworks (Visual C++, .NET Native, UI.Xaml) in their own folder.powershell winget download --id 9nblggh5r558 -d C:\temp\Store-Pakete\ms-todo\
-
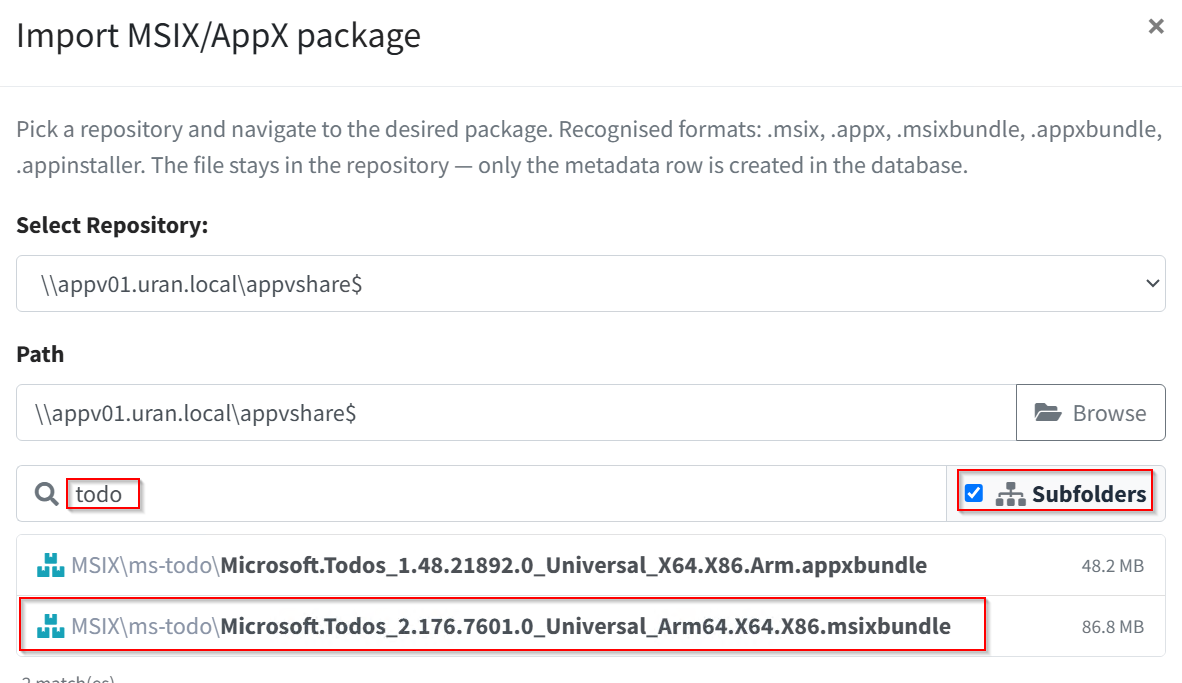
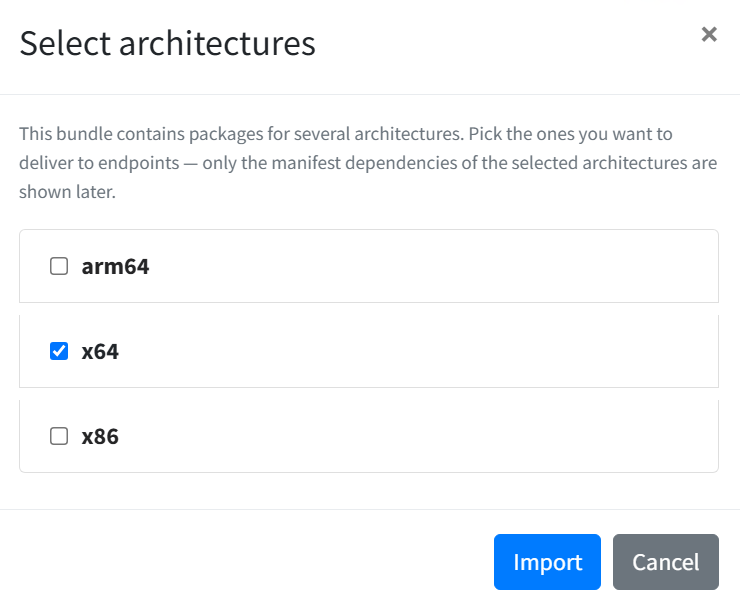
Import the bundle. As in section 6, searching for todo. For a bundle, the portal asks which architectures to deliver; x64 is enough for workstations.
-
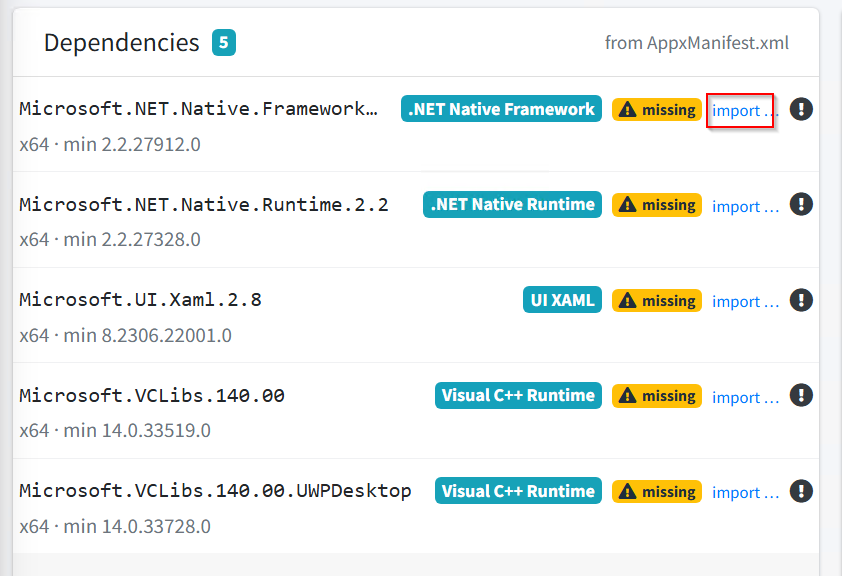
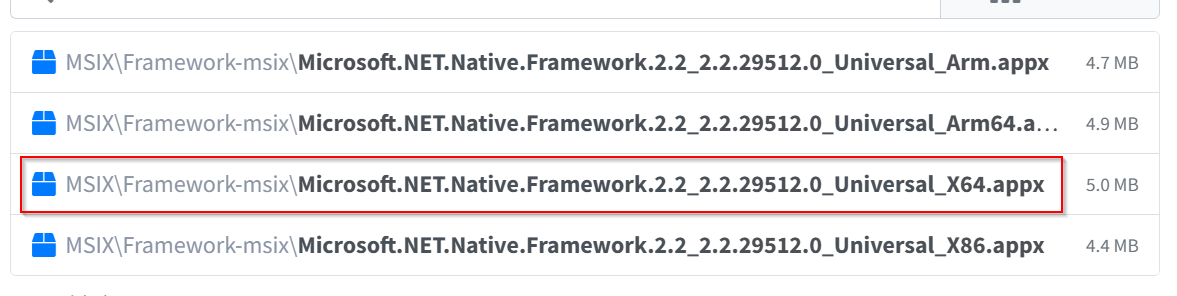
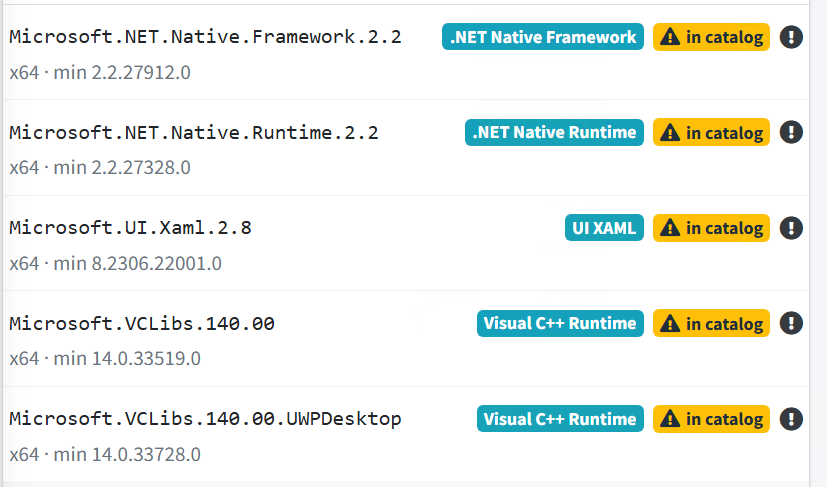
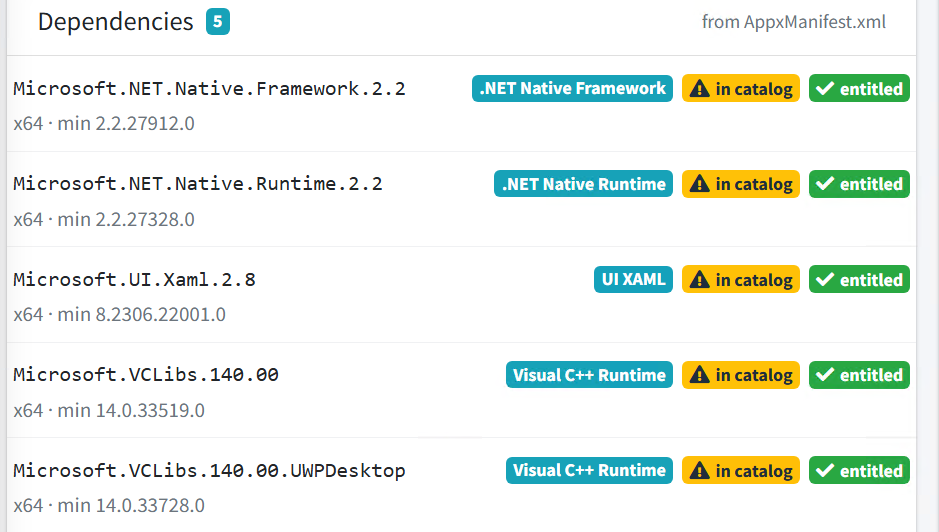
Pull in the dependencies. The package page lists the dependencies from the manifest and flags missing as long as a framework is not in the catalogue. import … opens the import dialog directly with the matching search term; pick the x64 variant. It then shows in catalog.
-
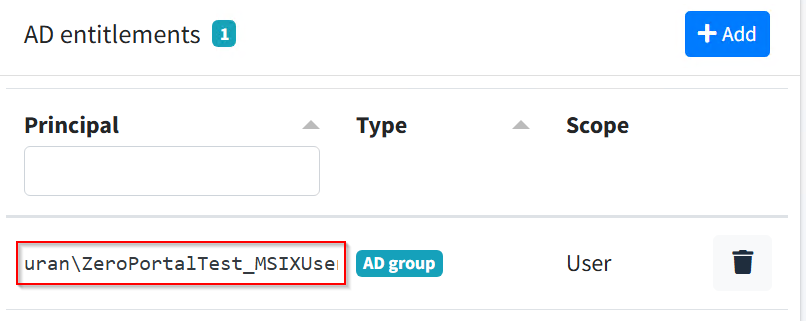
Entitle it. Add the AD group on the main package; the dependencies pick up the entitlement automatically and show entitled.
-
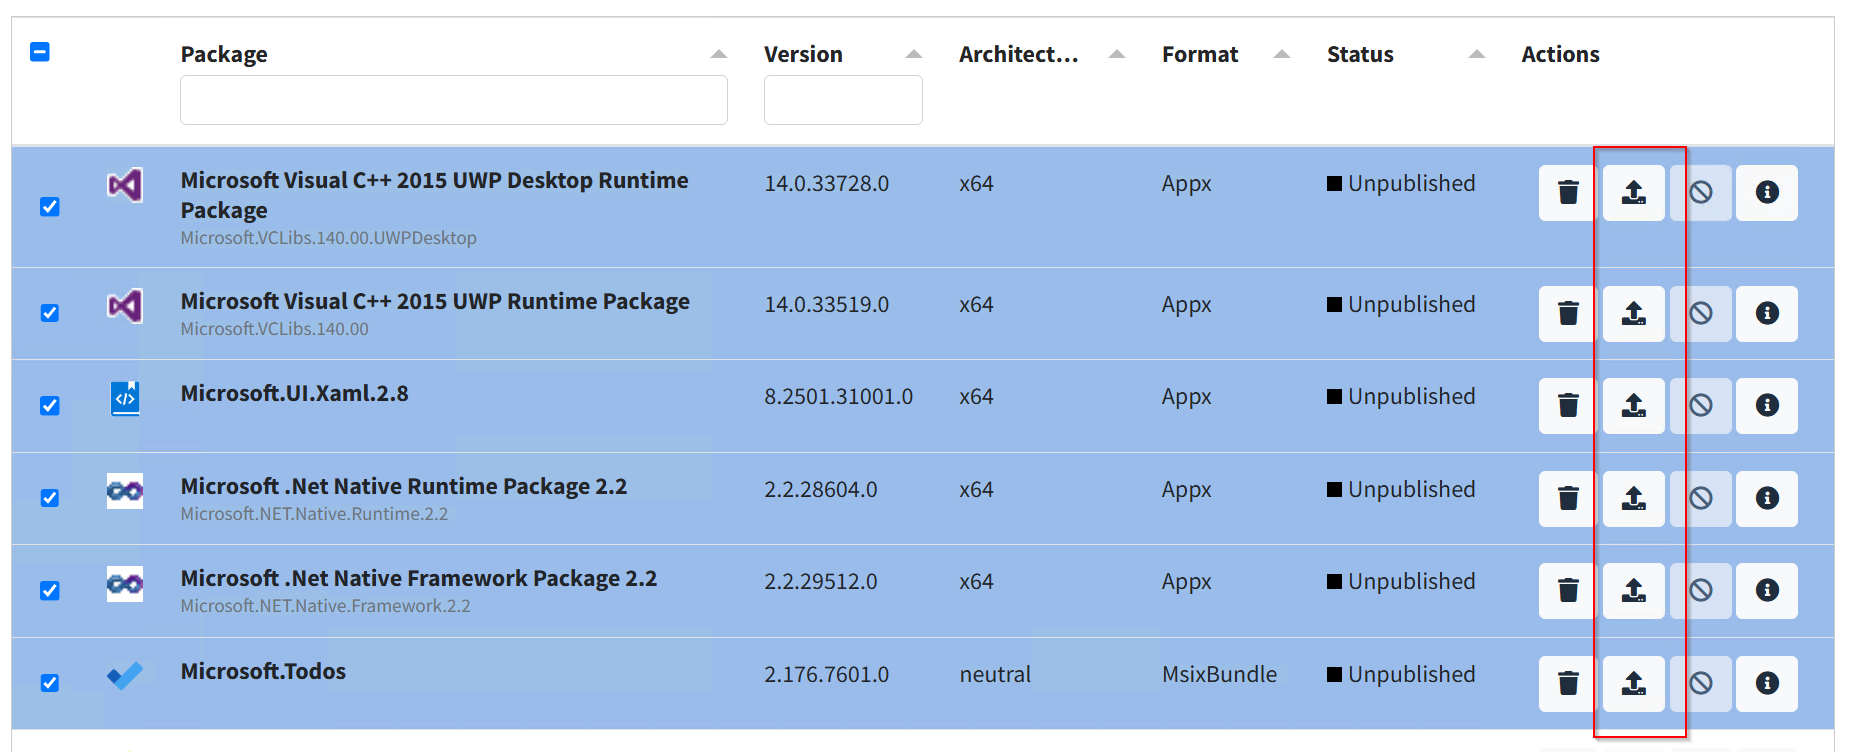
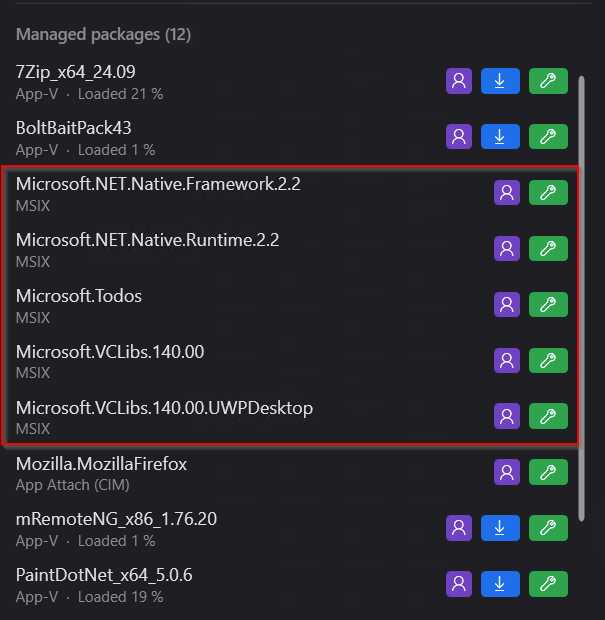
Publish together. In the package list, use Show frameworks to reveal the frameworks, select every row, and publish.
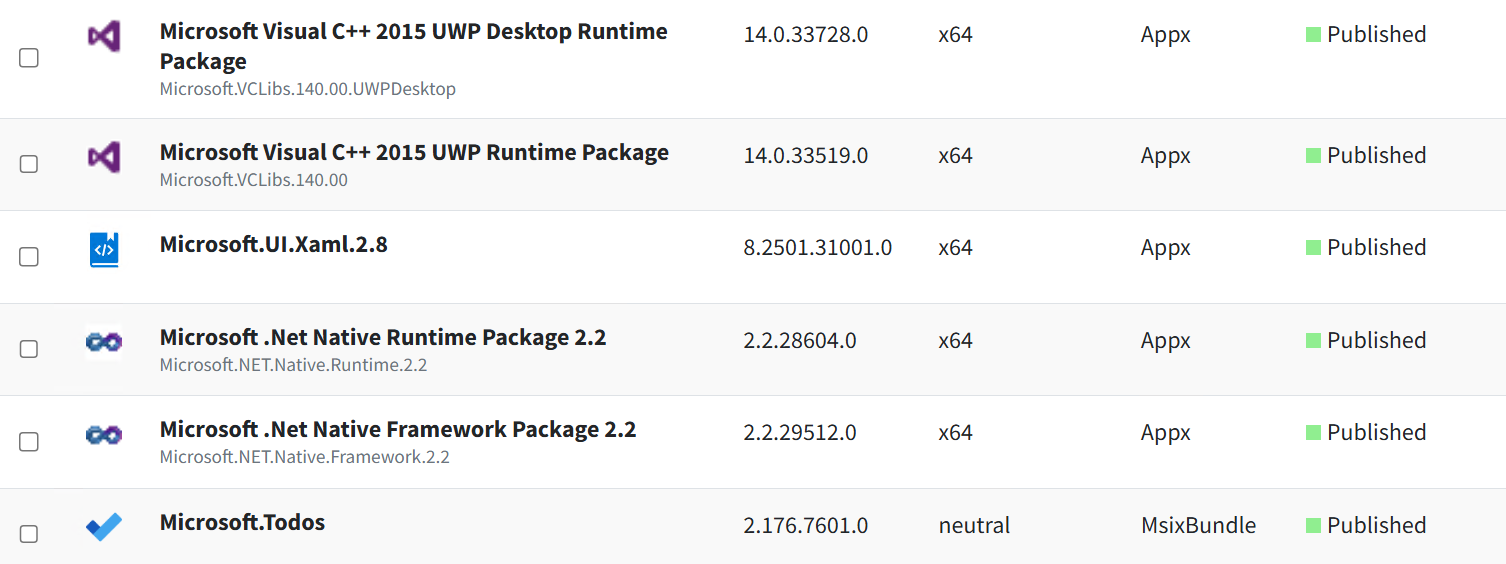
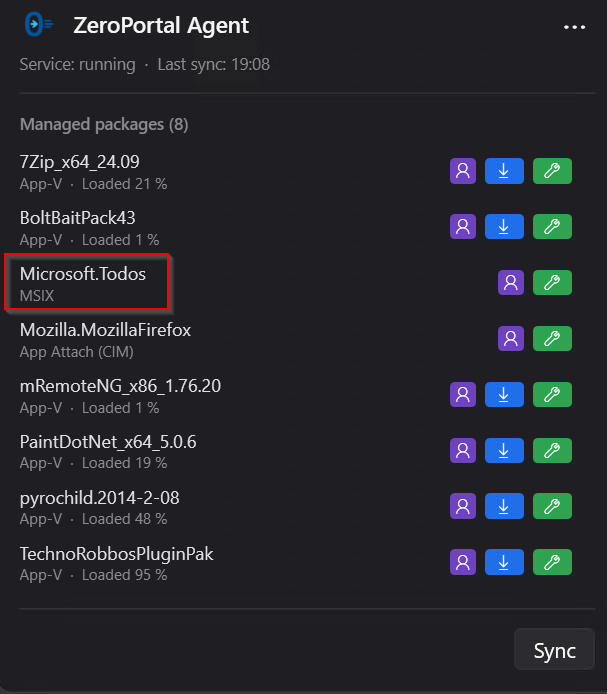
After the sync, the tray window shows To Do; the frameworks only appear with the Show framework packages setting on.
9. Desktop policy
User settings come through the same set. The Desktop (wallpaper, theme, icons) template sets the wallpaper, light or dark mode, the default icons, and, if you want, a BGInfo-style info overlay.
-
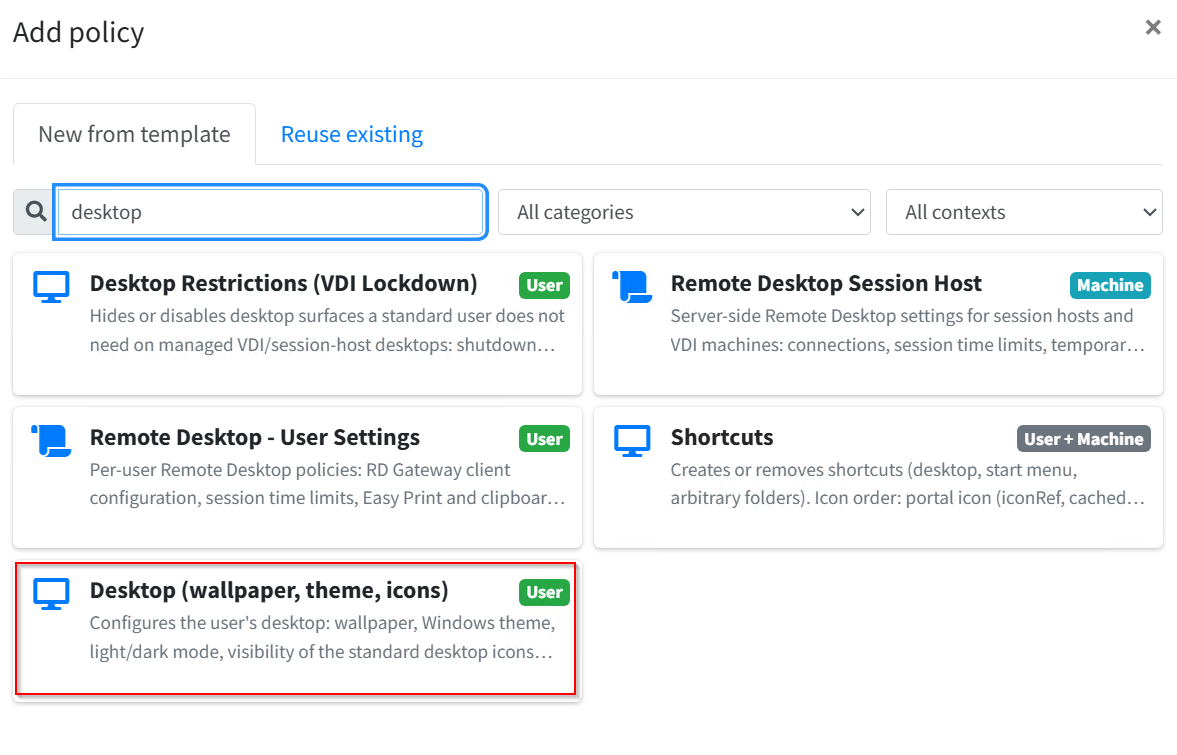
In the VDI policy set, use Add policy, search for desktop, and pick the template.

-
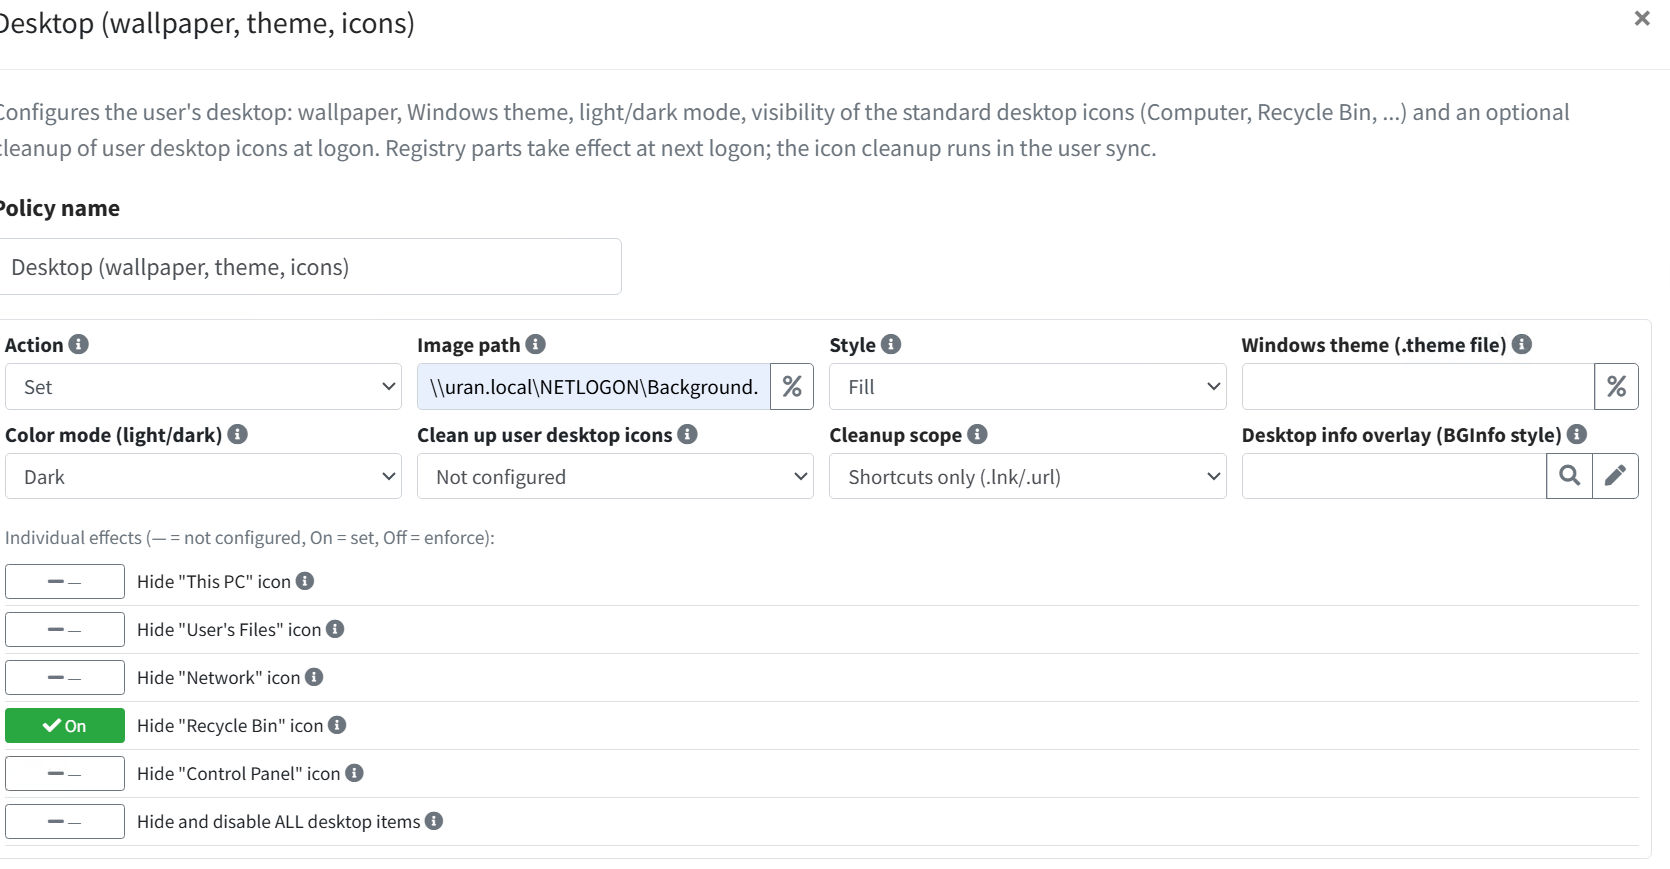
Set the image path, display, colour mode, and the icons. Individual effects has three states: not configured, set, forced off. Pick the overlay from the stored definitions.
-
Save. The agent writes the registry entries at the next user sync; they show up at the latest at the next sign-in.
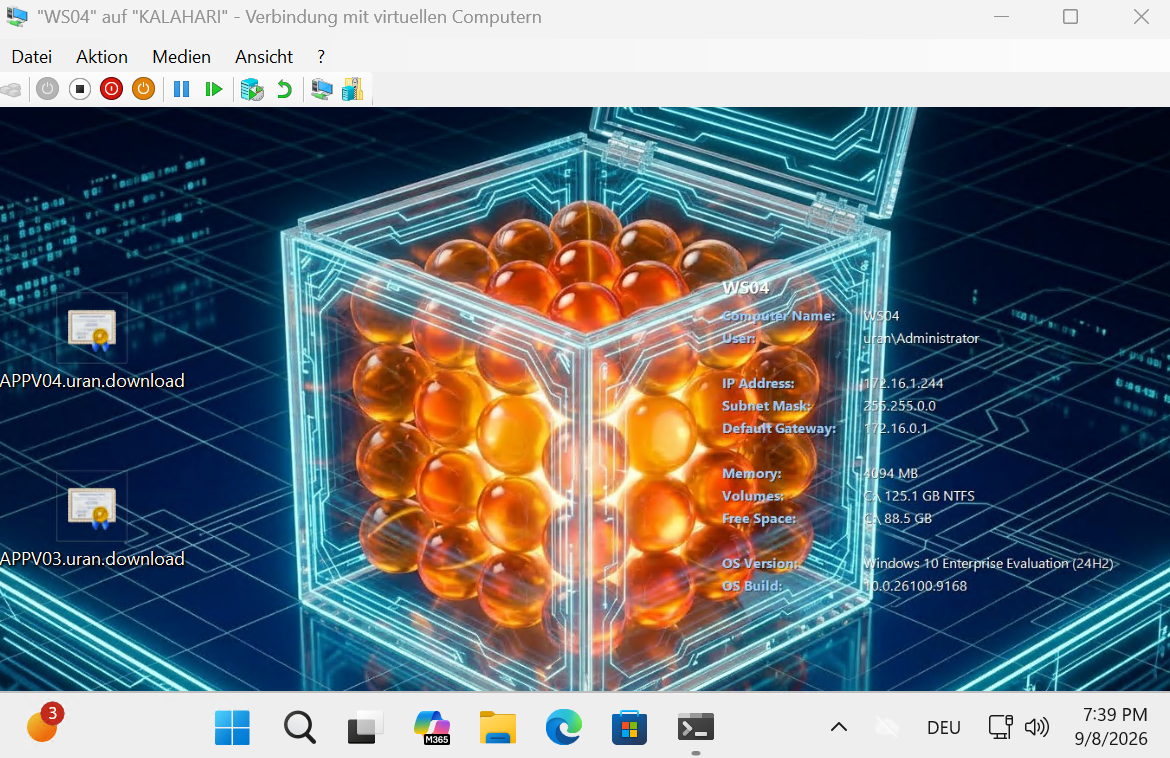
Because the set targets the computers' OU, the desktop policy applies to every user who signs in on one of these computers. This behaviour needs Agent 1.0.36 or newer.
10. What comes next
- More clients: move computers into the OU, install the agent by software deployment. Everything else comes from group policy and the portal.
- More applications: put the package on the share, import it, entitle it, publish it. Import new versions as their own package; the published version wins.
- High availability, backup, logs, updates: handbook chapters 11 to 13.
- Troubleshooting on the client: Open logs in the tray menu opens the agent's log folder; the table of common symptoms is in handbook chapter 13.